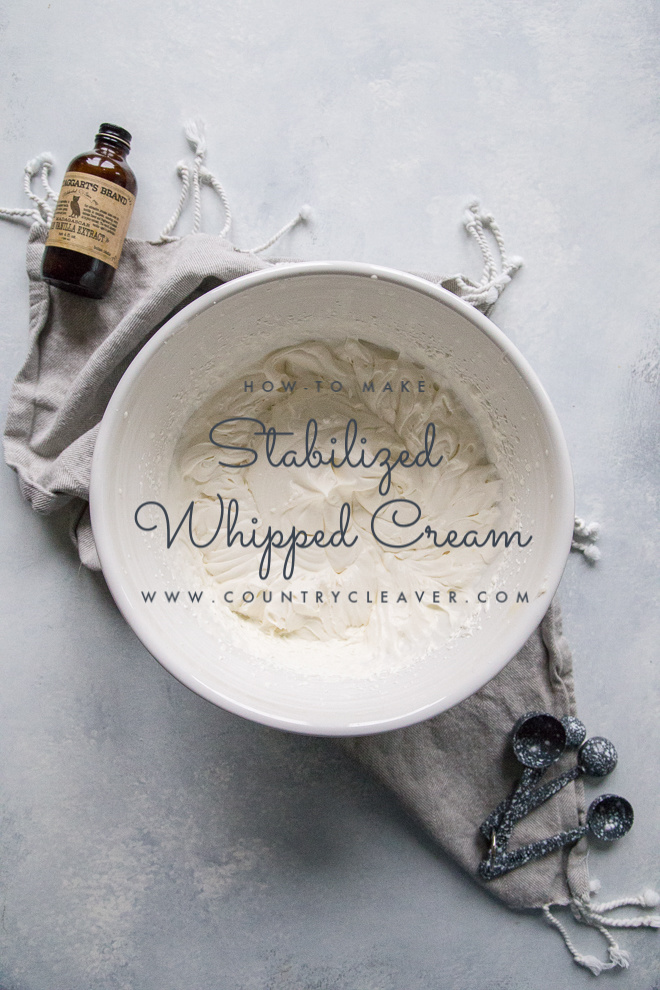
How To Make Stabilized Whipped Cream
This post may contain affiliate links, that if you make purchases through, I will earn a small commission.
Versatile and impressive this how to make stabilized whipped cream tutorial will come in handy for all your fancy baking needs, such as Black Forest Cake or Cream Puffs!
Making your own homemade whipped cream is a treat. It tastes delicious, and doesn’t take long. The problem though, is that if you don’t use it right away, it will deflate and fall, and get running after only a few hours. This how to make stabilized whipped cream tutorial is a step by step guide to making your own that will hold its shape for DAYS, and can be used in lots of different applications, like cake decorating, or making fancy French patisserie, like cream puffs or eclairs!
Made without puddings or artificial stabilizers, you probably have the simple ingredients at home right now!
I haven’t done a how-to in a long while, and it is one of the series you have all asked me to bring back. I’m so pleased you enjoyed them all, and if you want to look back on all the past how-to’s, check out the entire category on how-to recipes! Each of these has helped make me a better and more efficient cook, and I hope you will feel the same.
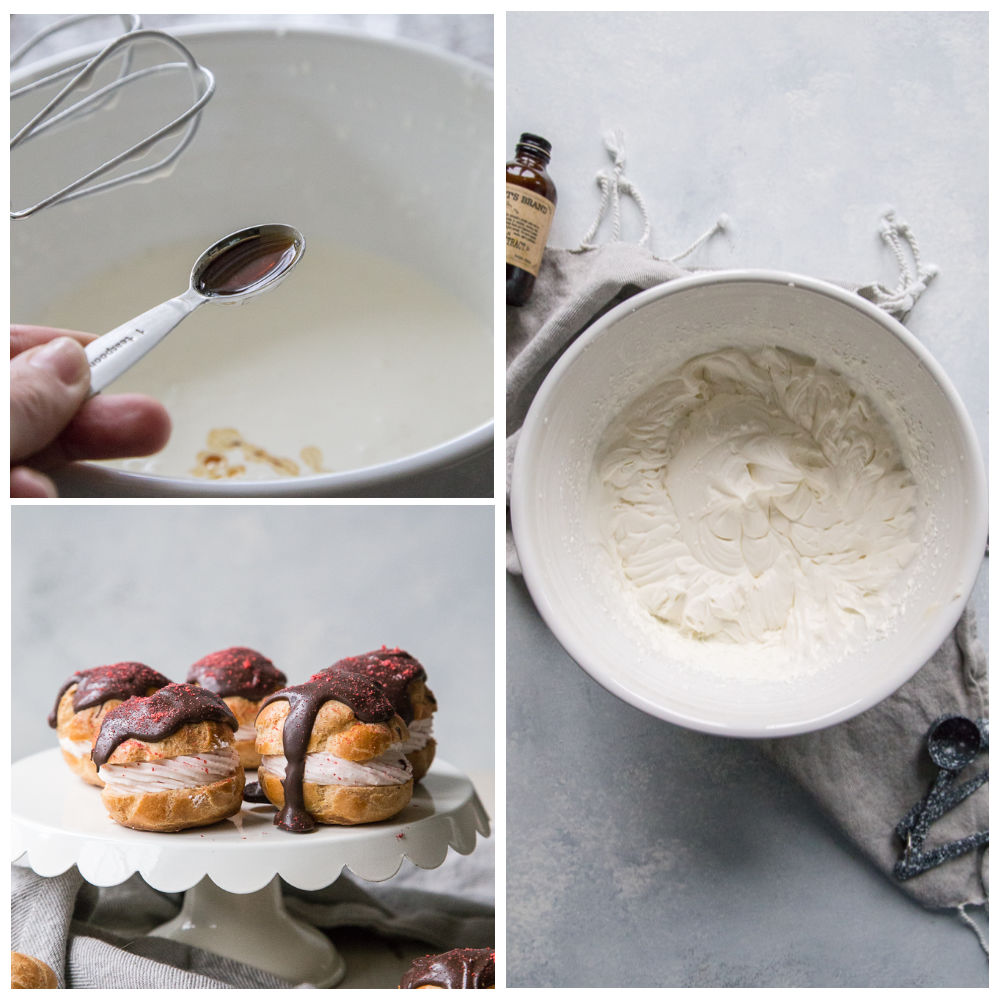
You only need four ingredients in this whole process – heavy whipping cream, sugar, cornstarch and vanilla. I recommend using heavy whipping cream because of the additional fat content over “regular” whipping cream. That 6% can make a huge difference in the overall stability of the whipped cream.
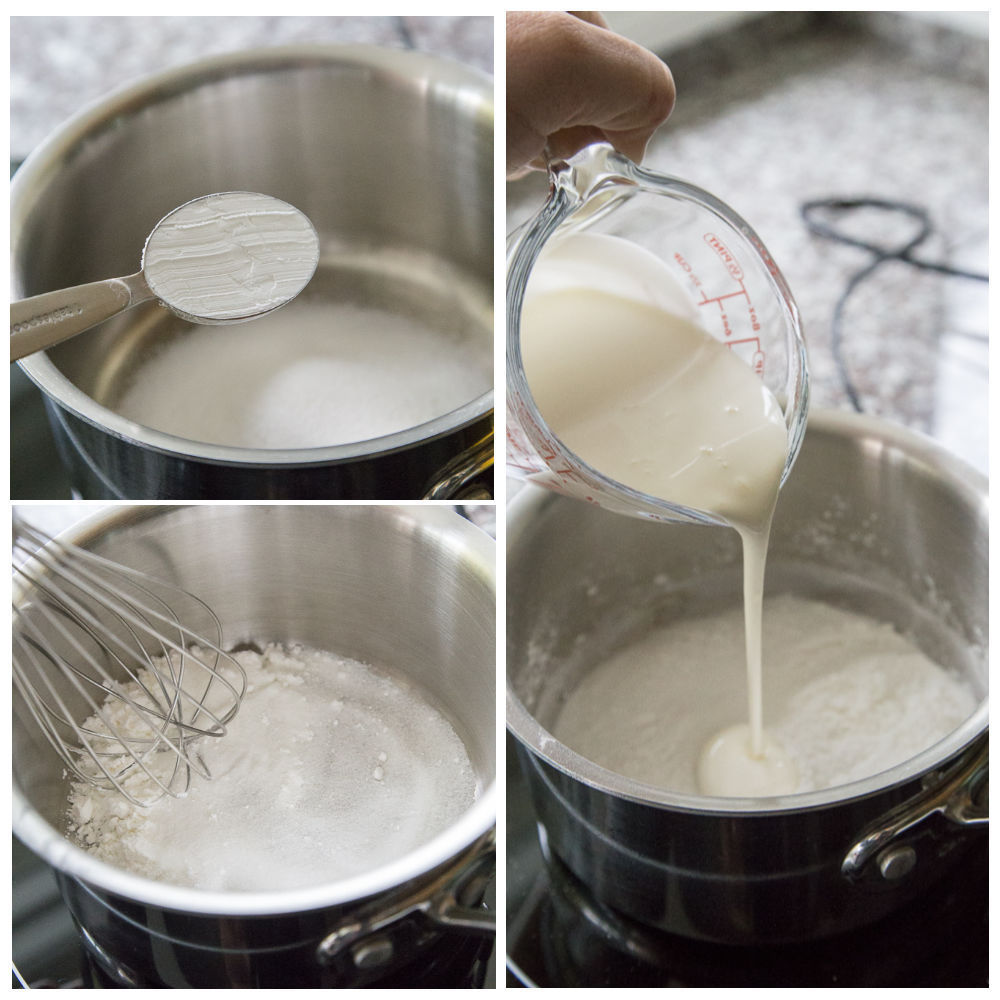
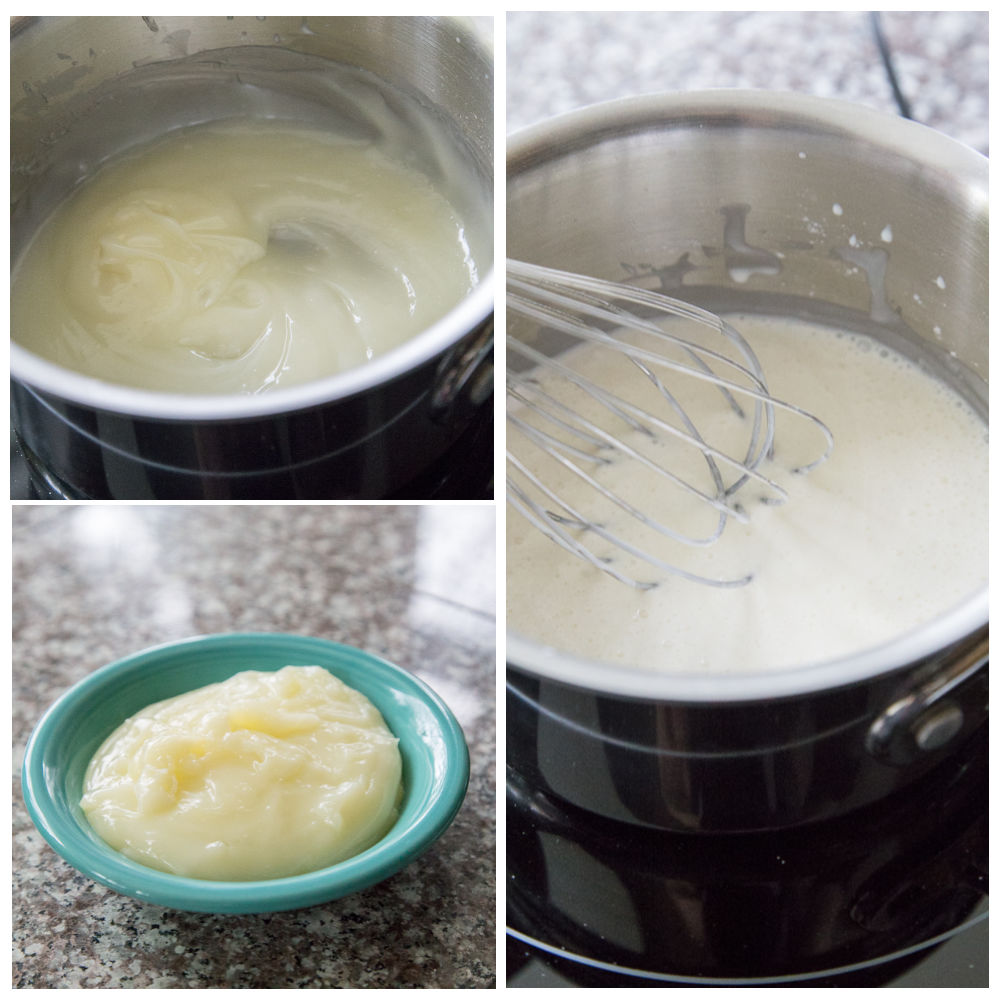
In your saucepan, you will create a stabilizing “base” for the whipped cream by bringing to a simmer the sugar, and cornstarch, whisked together, and 1/2 cup of the heavy whipping cream. Whisk constantly until the mixture begins to simmer and thicken. It will take just a couple of minutes. Once it resembles tapioca pudding, without the pearls, you can remove it from the saucepan and allow it to cool for about 30 minutes.
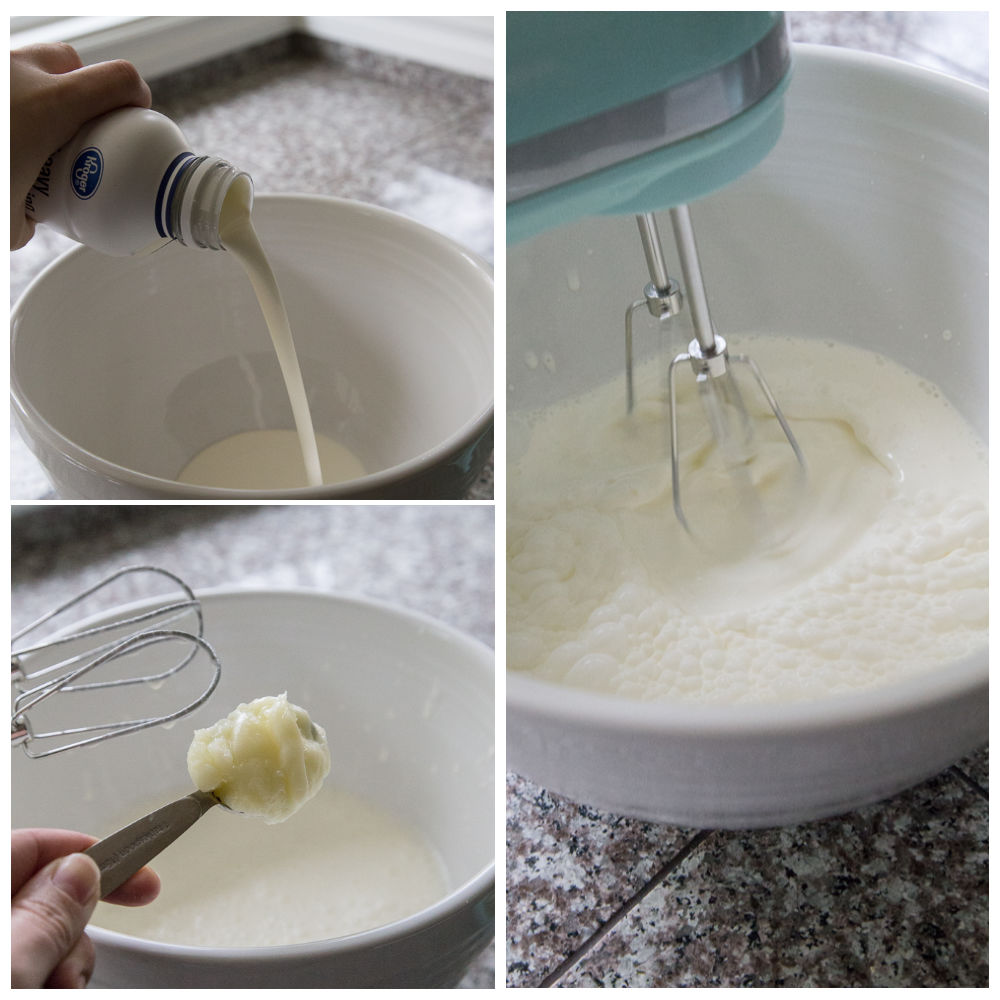
Once the base has cooled, pour the remaining chilled heavy whipping cream into a large bowl, and begin to whip it. Once air bubbles start to form, add in the base a spoonful at a time, until it has all been incorporated.
Just before you have reached the soft peak stage, add in the vanilla, and beat until the whipped cream has reach soft or medium peak stage.
And there you have it! Do one final scrape of the bowl, to make sure that no whipping cream has escaped, and then cover and chill until you are ready to use.
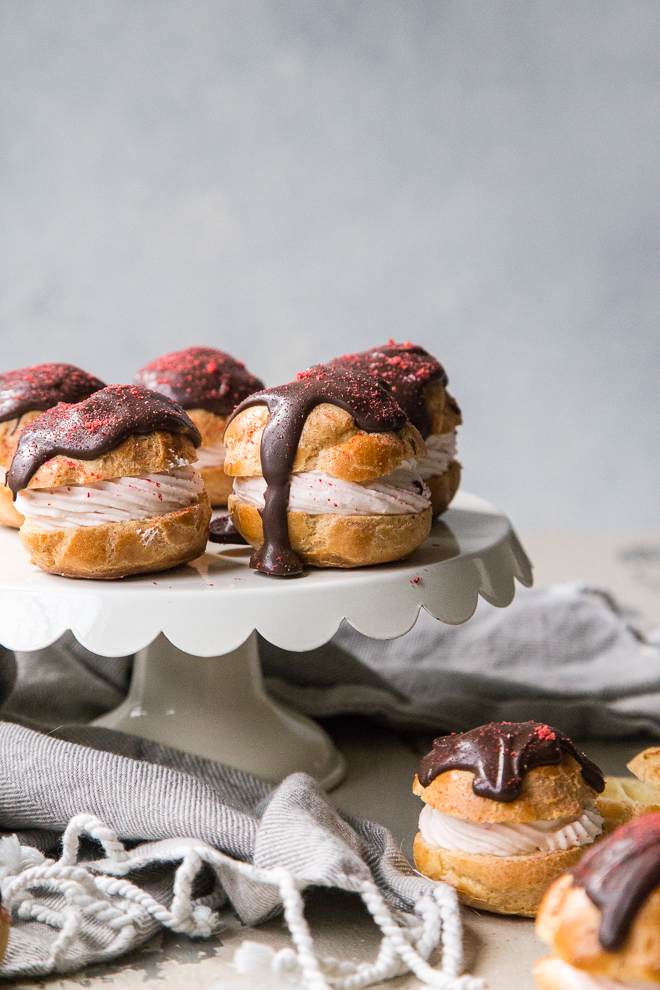
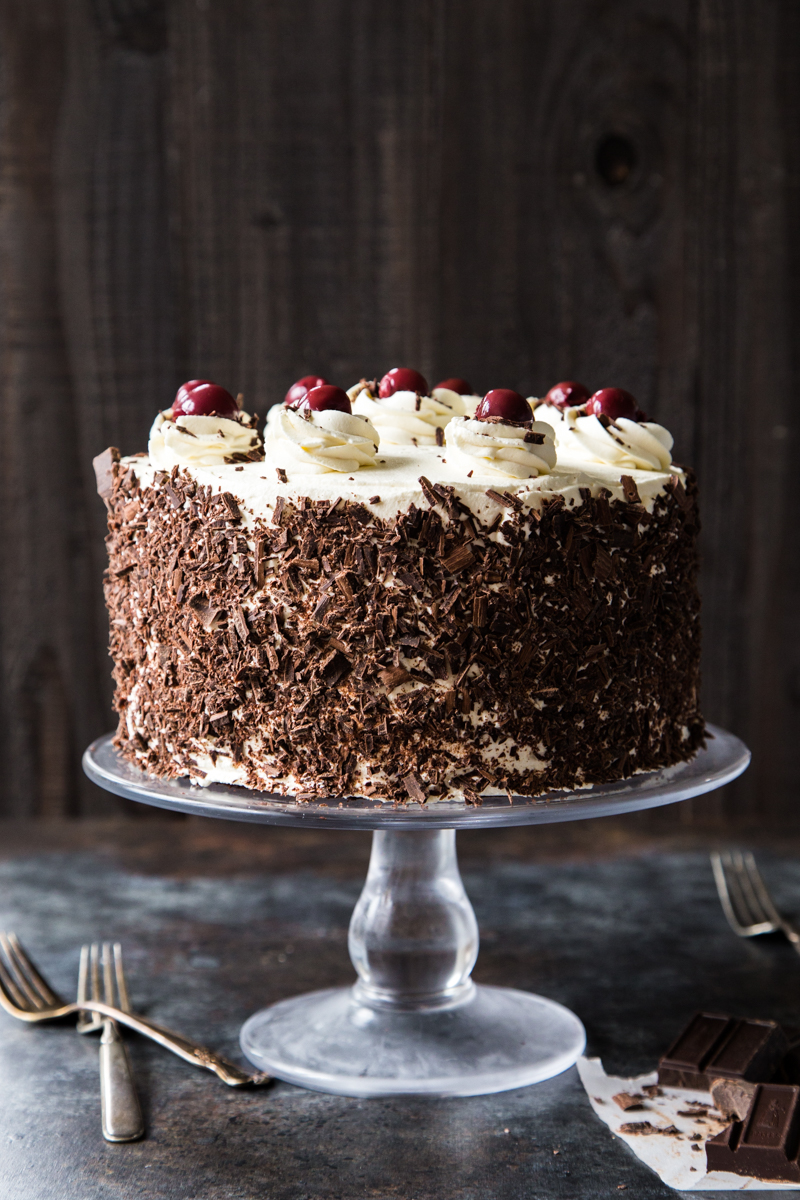
I have most recently used stabilized whipped cream in my strawberry cream puffs from last week’s post. And from the post on my nearly authentic Black Forest Cake.
Like any other whipped cream, you can add various flavors to suit your needs. You can also make stabilized whipped cream with up to 5 teaspoons of instant pudding mix which contains modified food starch that doesn’t require cooking. Vanilla pudding mix doesn’t add an odd flavor, so that is the easiest and most recommended option.
Gelatin can create an texture that is too solid for this type of application. It is a great way to add pipe details to a baked good without sacrificing flavors and textures of true whipped cream.
Why do you need to stabilize whipped cream?
Whipped cream is an emulsification of the fat and cream, aerated into whipped cream. But the issue is that it is not stable for long term service, making stabilizing it even more important so it doesn’t begin to melt or start weeping. Gravity will cause the water/liquid to fall out of suspension and wilt.
Stabilizing it and storing it in the fridge will prolong the look ant texture of the whipped cream. It will be easier to pipe into cream puffs, eclairs, or on top of pie, or even frosted onto cakes.
Tools for the Job
While I find that using my stand mixer is the best for whipping cream, there is definitely something to be said for using a hand mixer so you can feel the whipping occuring and stop at the exact right point to not overmix the whipped cream in your mixing bowl. Stiff peaks form will leave you with a pipeable consistency.
 Buy Now →
  Buy Now →
  Buy Now →
  Buy Now →
  Buy Now →
Chocolate Covered Strawberry Cream Puffs
Inspired Homemade Recipes To Try
Black Forest Chocolate Chunk Muffins
How to Make Chocolate Buttercream Frosting
Print
How To Make Stabilized Whipped Cream
- Prep Time: 5 Minutes
- Chill Time: 30 Minutes
- Cook Time: 10 Minutes
- Total Time: 45 minutes
- Yield: 6 Cups 1x
- Category: Dessert
- Method: Stove Top
- Cuisine: French
- Diet: Vegetarian
Description
Versatile and impressive this how to make stabilized whipped cream tutorial will come in handy for all your fancy baking needs, such as Black Forest Cake or Cream Puffs!
Ingredients
- 3 cups Heavy Whipping Cream, chilled
- 1/3 cup White Sugar
- 1 Tbsp Cornstarch
- 1 1/2 tsp Vanilla
Instructions
- Whisk the sugar and cornstarch together in a saucepan and whisk in 1/2 cup of the heavy cream. Bring the mixture to a simmer, whisking constantly until the mixture begins to thicken, about 3-5 minutes. Set it aside to cool completely, about 30 minutes.
- Using a stand mixer with the whisk attachment, whip the remaining 2 1/2 cups of the heavy cream until it is begins to get very frothy. Add in the cooled sugar/cream mixture. And beat the whipped cream until soft peaks form. Chill until ready to use, or use immediately.

I never like to leave unflattering comments if a recipe fails…just chalk it up to what not to do for next time. I must say that I really had high hopes for this recipe. The science behind it told me that it would certainly work. Unfortunately, it turned out to be a total waste of heavy cream. Although the taste was ok, the whipped cream was not stable enough to pipe, and sagged as it chilled in the fridge. The proportions are definitely off .
Dawn, I am sorry you did not have the same success I had with this recipe. When I have made it, it’s definitely held and was definitely pipable for cakes, I used it on my Black Forest Cake with huge success. I hope you will try to make it again. I wish I had some suggestions, as you mentioned you used Heavy Cream, that’s good since regular whipping cream wouldn’t have had the same fat. Hmmm. So sorry!
I noticed the only other comment is a little hard on the review….(usually when baking mishaps arise, method is often the culprit…) I use this recipe all the time and it has worked great with no issues…
Thanks!
Excellent recipe for whipped cream! Thank you!
I did notice that in your recipe “steps”, vanilla extract was not added.
Oh, thank you Cindy! I’ll get that updated. My fingers must have been moving too fast for my brain that day!