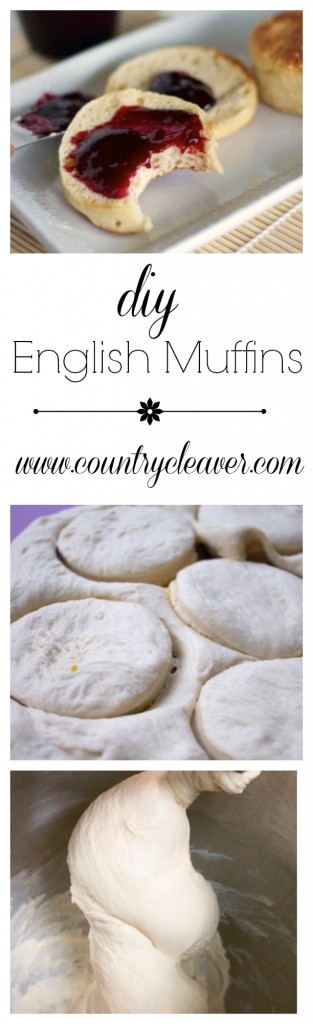
DIY English Muffins
This post may contain affiliate links, that if you make purchases through, I will earn a small commission.

Somedays I need a change. Should I spring for that bright-ass colored shirt and obnoxious necklace that jingles every time I step? Somedays that mom-sweater from Eddie Bauer I love so much just needs to take a rest.
*looks down at shirt regretting today’s clothing choice*
And somedays, I really need a change of pace in the kitchen. Now, I’m not going too far off the beaten path by any stretch of the imagination but I have been in dire need of an awakening. Much like my coffee in the morning that hasn’t really been doing it’s job in waking me up, my recipes and ideas in the kitchen have left me deflated as of late. Inspiration and a jolt was much needed. And it came in the form of my recently used Christmas gift from my parents – a cooking class.
Not just any class. No, no. One that speaks to me, the carbo-holic Czech girl — Artisan Bread.
Take that in for a minute, it’s okay. I’ll wait. Yes, artisan bread. For two days last weekend I was regaled in the delights and the ways of the bread. It was like Luke training to be a Jedi knight. But for girls. And with carbs. It was empowering.
*Sidebar* How did Luke not become a pompous little twit after all that training he so clearly rocked at? I mean c’mon kid, when you clearly kick so much ass it’s allowable to put a little spring in your step. This was bread – and even I felt like a rockstar! You’re a JEDI!
Okay, moving on. Like I said – cooking, baking and all things kitchen should be empowering and this really was. One of the first things we learned was the art of the English Muffin. Yeasted things and I don’t normally get along very well, as exampled here. But this time we did and all I could do was feel a tad bit of smug wash over me. And with this recipe – a little smugness could wash over you.
The pinnacle of importance in this adventure was the activation of my yeasts that normally don’t like to play nicely. This time they did. To make the muffins you being with a “sponge” or a stater, giving the yeast something to gorge themselves on and create copious amounts of carbon dioxide. It’s fun to say “copious amounts of carbon dioxide”. Try it. Now, fives time fast.

Once my sponge had doubled in size and was allowed time to feed, it was time to mix and knead the rest of the ingredients into a divine and satiny dough.

Into the mixer the starter went, along with the rest of the flour and salt. Salt and heat kill yeasts. Did you know that about salt? I didn’t. See how enlightening bread making can be?

After five minutes of kneading it was ready for one final rise, so into a greased bowl it went.
The hardest part of bread baking is by FAR the time required to let the dough rest on it’s own, undisturbed. It’s like watching a football game, or NASCAR (not that I watch much of that). You can walk away carrying on about your day, come back an hour later and it’s still. going. on. *rolls eyes* I don’t do well with things like that. So this gift in bread, was as much a gift in the lesson of patience. My mother knows me too well…
After another hour of rising, the dough was ready to be formed into muffins and cooked. Finally.

Onto a mat covered in corn meal the dough was stretched until it was between 3/4″-1″ thick. Be diligent to not overwork this dough. It’s soft and satiny, don’t make it chewy and tough for no good reason. Carb-crimes are not allowed here. (That’s the Czech girl coming out in me.)

With a 3 inch biscuit cutter, dipped into cornmeal so it doesn’t stick, cut out as many biscuits as possible. Re-roll the dough only one more time, so it doesn’t get tough. Efficiency counts here.

Once all are cut out, place one tablespoon of butter into a non-stick pan over medium-ish heat. Each stove is different so turn it up enough that the butter bubbles and will fry the outside of the muffins. My stove is notoriously craptacular, so it was almost on high for this to work.
Plunk each muffin down and allow to brown on each side. One minute or so each side. Set them on a parchment lined baking sheet and lather, rinse, repeat until they are all browned and on the sheet. Place them into a pre-heated 375 oven for 15-20 minutes until golden brown and beautimus.
Promptly transfer them to a cooling rack and resist all divine temptations to devour them on the spot. It’s tough. Trust me, I know.
Slather on some butter and jam, and off to the races you are.
Empowering and delicious – what every meal made at home should be. And at a cost of $3 per dozen, you’re totally ahead of the game. Take THAT Thomas Nooks and Crannies!
Ingredients for DIY English Muffins
Inspired Homemade Recipes To Try
Breakfast Reuben Sandwiches with Pumpernickel English Muffins
Easy Cinnamon English Muffin Bread
Cinnamon Raisin Streusel Muffins
Print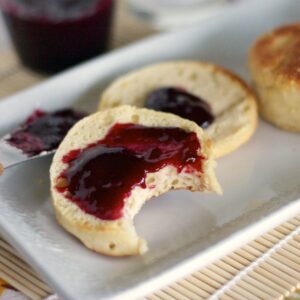
DIY English Muffins
- Prep Time: 2 hours
- Cook Time: 20 minutes
- Total Time: 2 hours 20 minutes
- Yield: 12 1x
- Category: Bread
- Method: Baked
- Cuisine: English
Description
Make your own English Muffins! Slather with butter and jam for an easy breakfast.
Ingredients
- 2 Tablespoons Vegetable Oil, For Greasing Bowl
- 4 ounces, fluid Water, Between 100-105 Degrees
- 7 ounces, fluid Milk, Between 100-105 Degrees
- ⅓ ounces, weight Instant Dry Yeast
- 2 Tablespoons Butter, Divided
- 1 pound Flour, All Purpose
- 1 teaspoon Salt
- ½ cups Cornmeal For Working Dough
Instructions
- Grease a large mixing bowl with vegetable oil. Set aside. Line a large rimmed baking sheet with parchment paper or a silicone liner. Set aside.
- In the bowl of a stand mixer, whisk together water, milk, yeast, 1 tablespoon of butter (melted and cooled to between 100-105ºF) and 5 ounces of flour. Cover with plastic wrap and let sit for 30 minutes to form a “sponge” or “starter” for muffins.
- Once the sponge has doubled in size, attach dough hook to the stand mixer along with the bowl. Turn on low and add in remaining flour to the sponge that was formed. Add in salt. Allow to mix on medium and knead until satin and smooth, approximately 5 minutes.
- When kneading is complete, scrape dough from mixer bowl and transfer to greased bowl that had been set aside. Cover with plastic wrap and allow to rise 45 minutes to 1 hour.
- Preheat your oven to 375ºF. Dust a clean and sanitized countertop or work surface with cornmeal. Turn out dough from greased bowl and stretch evenly until it is about 3/4″ thick. Handle dough lightly so it does not become tough.
- With a 3″ round biscuit cutter, cut out as many rounds as possible. Place them on parchment or silicone lined baking sheet. Re-roll dough to obtain more muffin rounds. But do not re-roll more than once.
- In a large skillet, heat remaining 1 tablespoon of butter to coat the pan on about medium heat. Lightly brown each side of each muffin, about 1 minute per side. Place each muffin back onto lined baking sheet until all have been browned.
- Place in heated oven for 15-20 minute until cooked through. Immediately cool on a wire rack when completely cooked. Serve warm with jam of your choice and devour.
- The muffins can be frozen to preserve or eaten within 4 days.
Notes
Adapted from Sur La Table

I’ve been awaiting this post since I saw your instagram pics from the bread workshop! I cannot wait to try this recipe!
This is going on my list! Love that last shot Megan:)
Ooh I haven’t had muffins for ages, these look great! You make them look so easy 🙂
This reminds me of my days in baking and pastry school. Great pictures. These look amazing!
WOW!!!!!! Can’t wait to try this recipe!! Yum!
Oh man, I tried making homemade english muffins last year and failed MISERABLY! They tasted right, but they were hard as rocks. If I get enough mojo (i’ve been in a cooking rut myself), I’m going to give your recipe a shot. I want that same kind of success!!
Oh my freakin’ moon and stars! I got so excited when I saw that first photo that I started to hyperventilate a little. I thought I was going to ………………………………………………………………………………………………………………………………………………………………………………………………..black out! Thank God that didn’t happen.
The first thing I thought when I saw the first snap was (not kidding) “she found a way to give it the “real” outside!” What a wonderful class for you to be able to take.
Girls + carbs = empowerment.
Preach.
Really Yummy recipe..Would love to give it a try…Thank you so much for posting this..
Aarthi
http://yummytummy-aarthi.blogspot.com/
wow, so not only are english muffins healthy, you made them even healthier by making them from scratch! awesome, megan! i love this 🙂
Yum! These look great.
And I totally live in old sweaters and sweatpants. It’s gross. I should hit up Forever 21, I guess. 😉
These look delicious! I love english muffins, but I’ve never made my own. I will have to try making these soon.
I’m seriously impressed – these are amazing – congratulations!! it’s great to push the envelope from time to time!
mary x
I’m in love with this post! I usually don’t purchase english muffins at the store because for some reason they taste super funky. Anyways, I think making them from scratch will make a huge difference. Thanks for the recipe!
Yum! I just made english muffins for the 1st time yesterday. I like your way of cooking them better than my recipe – I am going to have to try this next time!
That sounds like such an awesome class! I’ve been dying to take a class, but I don’t know what’s stopping me.
There is a restaurant that serves the best cheeseburgers, and they are served on homemade english muffins! *drool*
These look sooooo good!!! and SOOOO easy!!! Wish I could have taken that class with you!
I just ate dinner. I am not hungry. Yet somehow I find my mouth now watering as I look at those amazing English muffins. Someone should send me to bread school. I could use a little inspiration lately! Thanks for sharing, Megan. It sounds like you had a great time at that class!
Have I told you lately how much I love it when you talk Geek and Carbs in the same post? English muffins are definitely added to the list!
I could really use those english muffins for my breakfast tomorrow!
They look great! And aren’t you lucky to be attending an artisan bread class! Bookmarking the recipe. Will surely give it a try! Thanks for sharing!
Pingback: Country Cleaver » Pain de Epi -aka- Fancy Ass Baguette
Wow!! These look fantastic!!! Definitely want to give these a try!!
Yummers. Your posts have taken over my bookmarks.
Pingback: Friday Features | Funny and serious and wise - sunny side up
Pingback: Friday Features | Funny and serious and wise | sunnysideup
Pingback: Country Cleaver » Breakfast Reuben Sandwiches with Pumpernickel English Muffins
Pingback: English Country Muffins From Mary