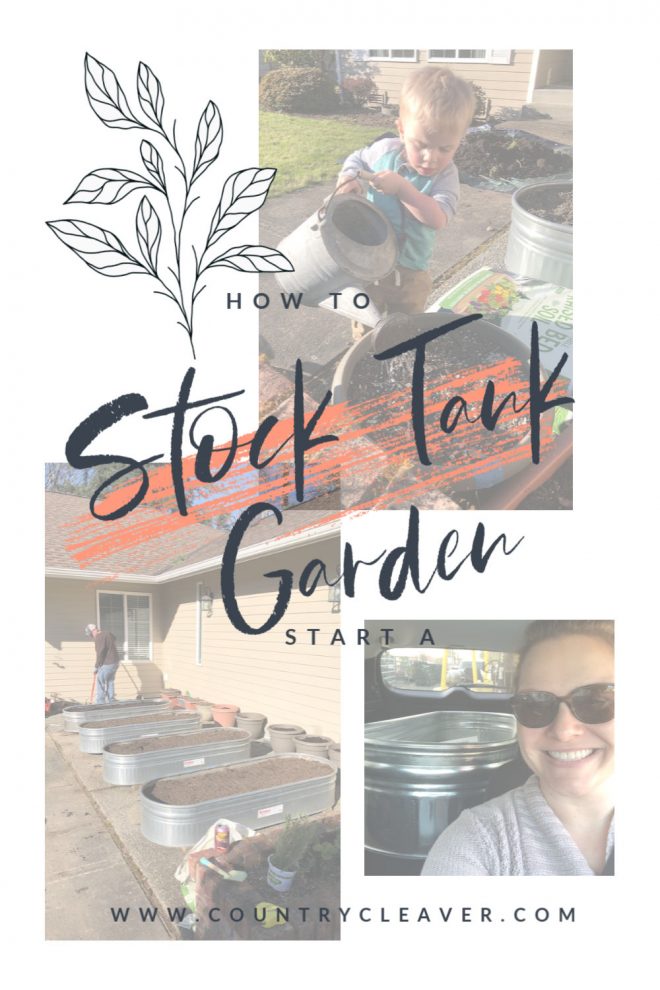
How To Start A Stock Tank Garden
Take the guesswork out of gardening with a tutorial on how to start a stock tank garden! Simple, clean, and totally Pinterest worthy! These tips are great for any raised garden planter or raised garden bed, too!
There are so many lessons we learned last year, and we know we will continue to learn more as we grow a new garden this year. But since I have been getting lots of questions about our stock tanks, I wanted to share with you how we are going about it this time around. Here you’ll find my garden layouts, how we set up the stock tanks on our front patio, how we are choosing what to plant – and where – based on our sun, and more!
This stock tank garden makes for an easy DIY project that will take about 1 day for four tanks, and is fun for the whole family if you are getting into gardening and growing your own edible plants for easy harvesting!
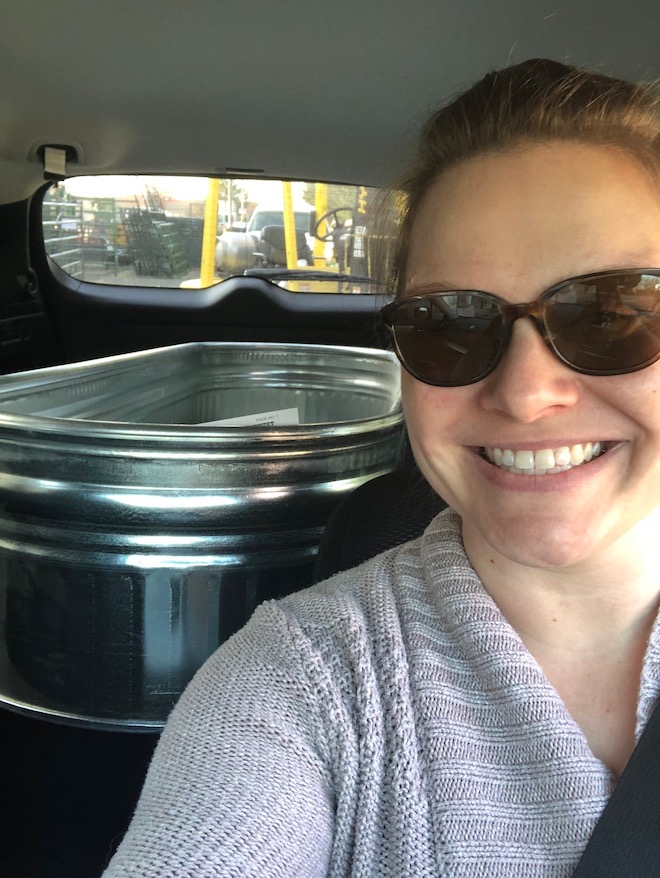
And yes, a stock tank does fit inside the back of a Subaru!
All About Stock Tanks
Where to start? How about with the stock tanks themselves? Stock tanks are made out of galvanized metal, and very resistant to rust, hard weather, and well, animals kicking them. Depending on the space you have, you can go a few different ways since they come in all shapes and sizes. I opted for sheep stock tanks that are short, at only a foot tall. Ours galvanized stock tanks measure 6 feet long, 2 feet wide, and 1 foot deep.
Some plants do better in deeper stock tanks, and for those I would get the 2 foot deep stock tank planters. Tomato plants do better with planters that have significant depth, so that their roots can go down really deep. If you want to plant tomatoes in your raised bed, make sure the soil depth is at least 2 feet deep.
Veggies like carrots, beans, and beets do well in 12 inch raised beds. You can also grown any other number of vegetables or pepper plants, like jalapenos, in shallow tanks. Fruits like strawberries can do really well in the shorter tanks, too.
Where Do You Find Stock Tanks?
We got ours at the local feed and garden store. Depending on the time of year, or if there is a sale, you can find them for anywhere between $110-$140 a piece. Behlen is a common brand you might find. It is a bit of sticker shock at the outset, but they will last for years. They are a lot less prone to icky things like slugs, where plastic pots were magnets!

Tools Needed
To create these tanks you will need:
- Drill
- Drill bit, 1/2″ drill bit is great
- Landscape Fabric,
- One 8 foot 2×4, per tank – cut into 4 equal 2 foot lengths
- Raised Bed Soil
To ensure adequate drainage, you will need to use your drill to drill drainage holes. You will want at least one dozen holes in the bottom of the tank to ensure proper drainage. Since these are meant to hold water and feed, you need to make sure there are enough avenues to get excess water out of the planter.
The next step is to line the bottom of the tank with landscape fabric to prevent soil wash out through the holes. The holes are small enough that it doesn’t require anything robust like wire mesh. And if you skip this step, it isn’t the end of the world, you can leave the bottom bare, it’s not the end of the world. Or you can add a layer of gravel as well. Options are endless!
Place the four 2-foot lengths of 2×4’s, or even 4×4’s equally spaced under the bottom of the stock tank to allow for airflow and extra drainage. You can also set them up on cinder blocks.
Filler Materials
Some people swear by adding cardboard, sticks, or other filler material to the bottom of your metal stock tanks. You can absolutely do that, but for the shorter tanks (mine are 12″ deep) I don’t find it necessary. Just use a raised bed mix in the tank. If you are using 2 foot deep units then filled material will help cut down on your cost of potting mix.
It’s dealer’s choice on what works for you.
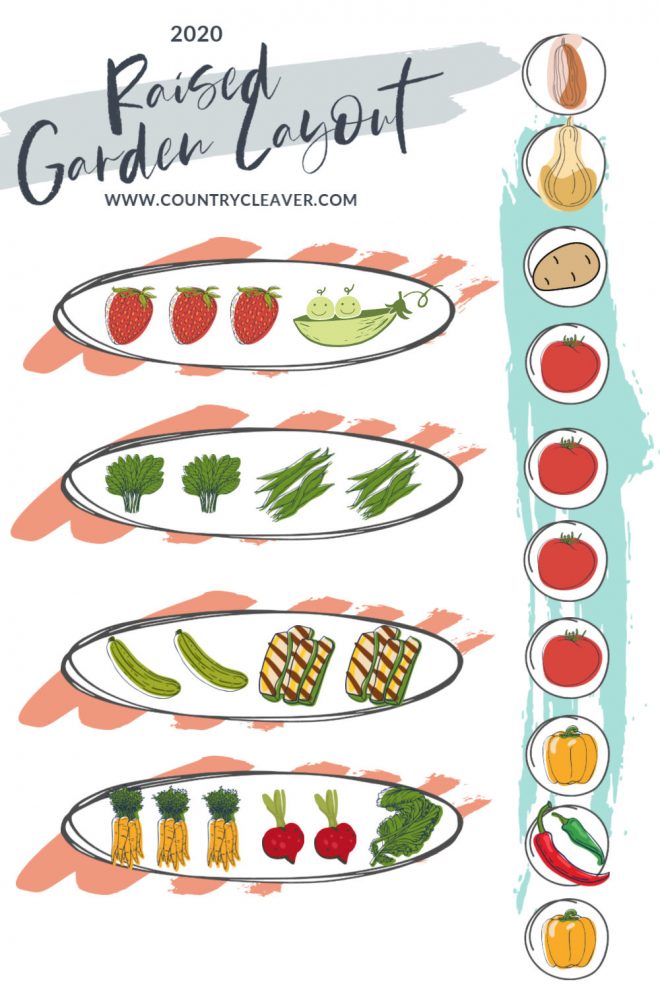
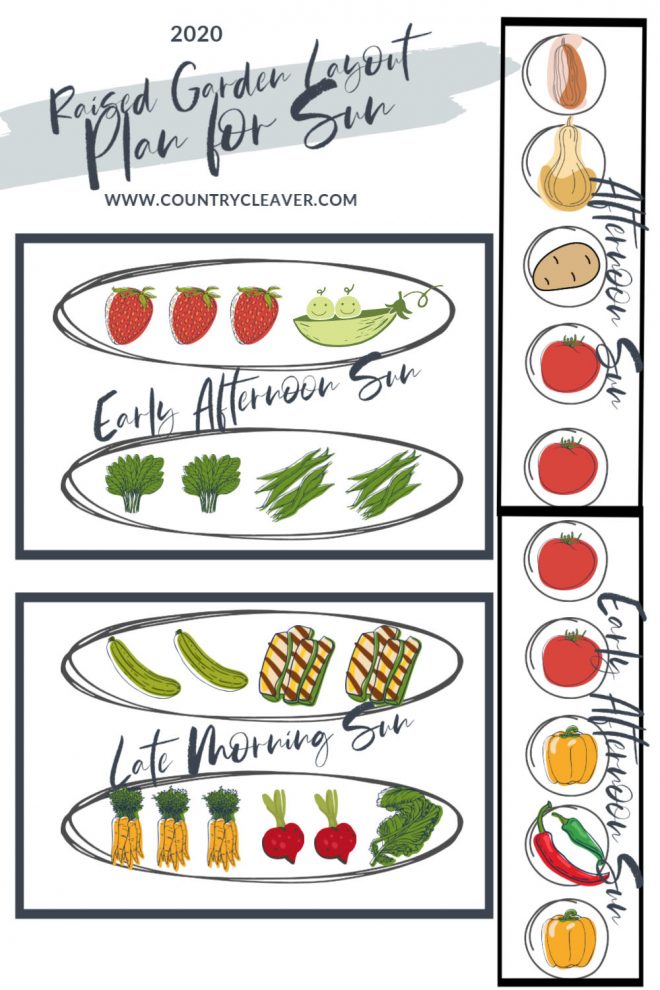
Think About Your Layout
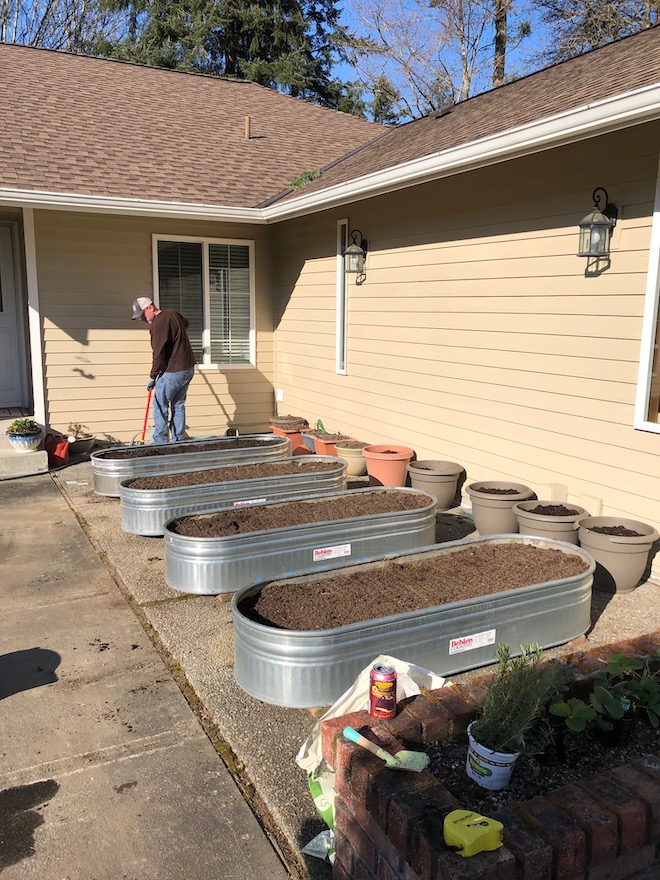
What do you want to grow? And how much? These tanks are great, because you can fit a lot into them. More than I initially thought! When you are doing a layout of your tanks, think about how you want to move around them. It sounds silly, I know, but it is really worth consideration. This year we added a fourth tank, and had to re-lay out our tanks to get the right spacing, and even distribution. It mean unloading three tanks of dirt just to move them a foot over!
Along with the layout, take the sunlight into consideration. Do you crops need only partial day sun, or full sunlight to thrive? Our plants need 8 hours of direct sun to flourish.
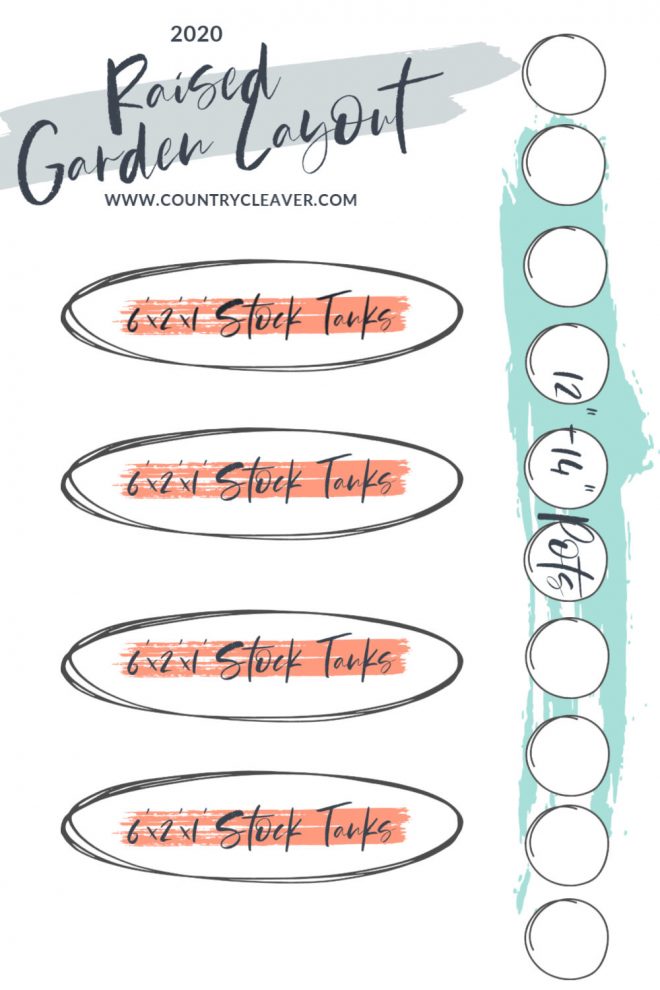
How to lay out a stock tank garden on a limited foot print
For me, I need to be able to bend down and get into the pots without banging my knees into the sides of the tanks and two foot spacing is perfect between the raised garden beds, and mean I could sit on the adjacent tank while working on another one! No bum knees. And we can still get a broom between the tanks to keep a clean space.
Here is what our tanks and pots look like right now.
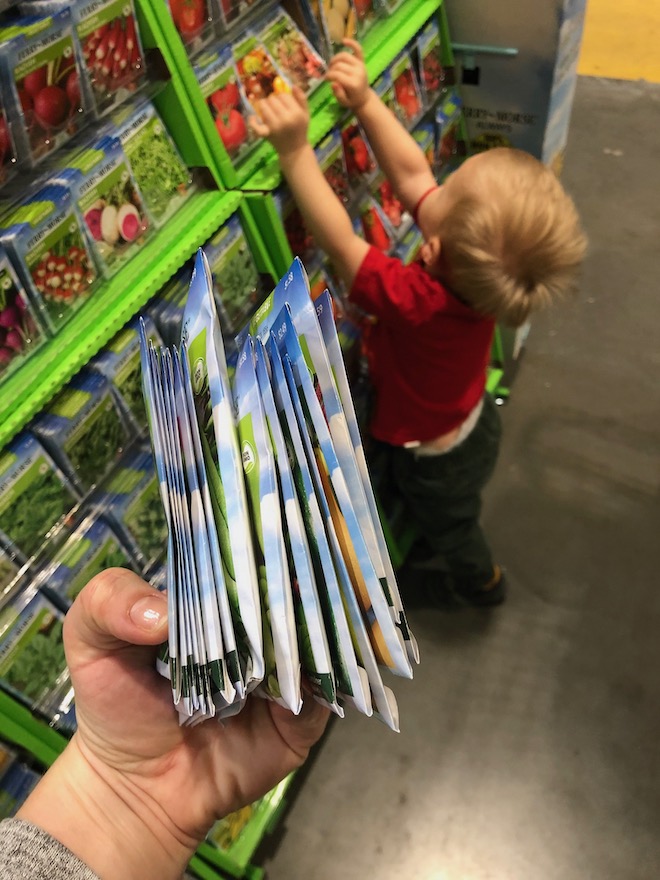
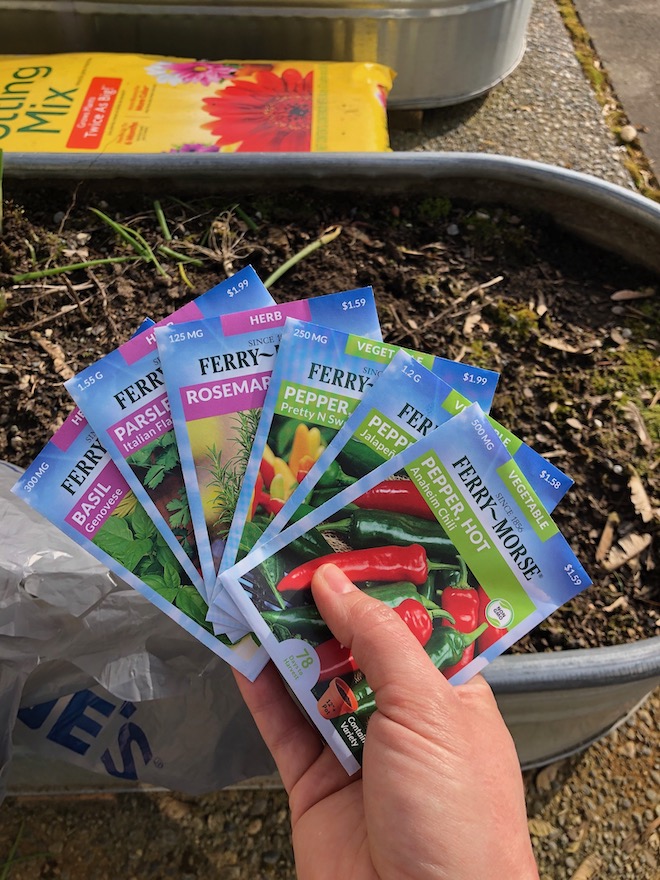
What Are You Planting?
For the most part we are growing what we did last year in our stock tank garden, you can find new varieties that are more “container friendly”. There are so many different kinds, but different varietals react differently to different conditions – like in ground, or in containers like our stock tank garden. So, if you picked out something that doesn’t specify “container friendly”, all is not lost! Plant them anyway, because you may have success! Don’t be intimidated.
This year, we are doing more squash, and peppers, and strawberries (because Emmett loves them). Green beans, carrots, snap peas, and herbs have all wildly successful in our metal stock tanks. Lettuce would also be a good one to include here, too!
Stock Tank Friendly Vegetables
- Zucchini
- Jalapeno or Spicy Pepper varities
- Strawberries – they will throw runners out, so dedicate one whole tank to strawberries.
- Green Beans
- Carrots
- Snap Peas, or snow peas
- Basil
- Thyme
- Chives
- Lettuce
- Carrots
- Garlic – they require far less water, so plant alongside plants that like dry soil. Or plant a whole tank on their own!
- Radishes
- Beets
Using square foot gardening techniques lend themselves well to these planters, giving them enough space for them to grow, but not be overly crowded.
I had mixed results with beets and Swiss chard last year (and by mixed, I mean it sucked), so they won’t make a reappearance. Bush beans, snap peas, and carrots were all huge hits and I got enough out of our basil to make an endless supply of caprese, and homemade pesto.
Plant 75% of What You Like, 25% You Haven’t Tried
For me, I wanted to strategize what we were planting a couple different ways – plant what we love to eat, and plant a couple of things we wanted to try. Think of it like a 75/25 approach. 75% what you will eat, cook, or preserve right away, and 25% what you want to try that is new to you. That way you don’t get overburdened with a “WTH am I going to do with THIS?” problem and letting your hard work go into the compost because you can’t use it fast enough.
Dirt is Dirt, Right?
One of our biggest lessons learned for raised garden beds is that not all dirt is created equal. In ground gardens can typically handle a slightly tougher dirt, but our raised beds did not tolerate the heavy top soil that we put in last year. What we got from our local garden center was what they called their garden soil, but it was definitely more suited to in-ground gardens than our tanks. It was too firm, to solid, and basically was concrete when it got wet and then dried.
To help lighten the stress on our plants, we amended our tanks and pots with a blend of half top soil (from last year), and half potting soil out of bagged potting mix we got at the local hardware store. Each stock tank garden container takes about 6 cubic feet of soil. After blending it was much lighter and fluffier than last year, and I think it will be a much bigger success for starting ground sown seeds, and make a much easier transition for our started plants.
I know that I will need to use a fertilizer as well. And because these stock tanks are low, you might have to protect your young garden from ground scavengers like squirrels or bunnies. Especially early in the growing season.
Hand Watering or Drip Irrigation System
Really, this is up to you, what you have in your budget or space. While I would love to have a proper drip irrigation system, we are perfectly placed to hand water with our hose right next to the tanks. Drip irrigation can be really convenient, but come at a cost.
I suggest start with one season of hand watering and then if you need to change plans, work on that next season!
Any questions?
This is just a recap of how we chose to start a stock tank garden for ourselves, and really, there is no totally wrong answer here. Your plants need three things, water, sun, and dirt. So even if you’re making your first garden as a way to stave off the boredom of isolation, or taking a stand in your own Victory Garden of sorts, the best place to start is just to start! Buy stock tanks, dirt and seeds and you’re good to go! If you have questions on what we have done, please let me know!
How to Start Garden Seeds is about how I am starting my seeds for items like peppers, and herbs that need a little extra TLC before going into the ground. I have taken a lot of lessons from my expert garden mother, so I hope that it translates well into our own practice of starting seeds this year!

Pingback: Friday Faves | foodiecrush
never done this before, might be able to get away with one tank in my yard so will have to choose carefully what I grow in it, but what a fun project, thank you!
I am considering doing a stock tank garden and wondered how it is working out for you. Would you recommend it again? Do you feel like it is a good option for a raised garden?
Hi Syd! If you check out my instagram stories, I post near daily updates on our stock tank garden and you can see everything is THRIVING! If you don’t want to build your own raised beds, these are a great option! My tomatoes do better in individual pots than they do in the 12″ high stock tanks, but deeper tanks would be better for tomatoes. Everything else is going bonkers! Plus, they are easier to move if you want a new layout or to relocate them in the future 😉 http://www.instagram.com/countrycleaver
I have been vegetable gardening exclusively in stock tanks for over 10 years. I bought all but one off Craigslist or at yard/farm sales. I prefer the deeper tanks but I had carrots in my sheep stock tank (like yours) this year and they did well but I think would have done wonderfully in more soil.(this tank belonged to our Scottish Highlands and I stole it from them). I fill the bottoms a foot or so deep with combinations of peat, wood chips, compost, steer manure, leaves, old grass clipings and top soil. The top 18 inches I use ProMix potting soil mixed with my own compost. I just harvested one 2 x 4 x 2 tank of Burbank potatoes and got at least 15 lbs of perfect spuds. I have been harvesting tomatoes, onions, peas, cucumbers (trellised) green beans. trellised zucchini and summer squash. I spend minimal time weeding and they are very water efficient. I have recently converted several over to ‘wicking tub’ watering with great success, even in 95 day heat. I would not mess with veg gardening without this method. Keep doing what you are doing; you will be very successful. It makes me happy to see two more generations enjoying gardening.
Hey Marti!! I am so glad that you have clearly had so much success with your stock tanks! Also I ADORE Scottish Highland Coos 😉 I have definitely considered the deeper tanks for next year for more potatoes and I think my tomatoes would appreciate the deeper tanks too – as opposed to the large 18-20″ pots I’ve had them in (even though they have thrived in those – I don’t like the look of so many pots and clutter.) ha!
Aloha, we live in Hawaii and we are Gardening ViRGINS!!!! I’m a single mom trying to just grow some veggies and fruits for ourselves and family friends before we hear the ships are delayed in bringing stuff on island. I’ve purchased a bunch of seeds, am willing to work so are my boys, but we do not know which is best, inground gardening or the raised boxes. My front yard gets so much sun, i had to purchase black our curtains so the sun didn’t cook my dogs when they were in the living room lol. Where do we start, what don’t we plant, what needs to be inground planted vs planter boxes. I’ve heard so many different opinions, but your page seems to keep everything real through your trial and errors. Any help is truly appreciated. Many blessings and much aloha to you and your Ohana.
Jenn
Jenn!! Mahalo, and Thank you so so much for your comment!! You know, it’s hard to know where to start, but for me the raised bed or stock tank gardens were the best place for me to start, and I have stuck with it! Start with raised beds, look for soil that is specific to raised beds as well. “Container friendly” seed varieties stay small, which is great. But I also use standard seeds in my stock tanks, you just can’t put as many things in there because the plants will get too big or spread out. Seeds will have instructions on the packet for how deep and how far apart to plant them. Just follow that and keep them moist and you should be fine!
My favorite place to start with a new garden is with basil, carrots, snap peas, string beans, strawberries, rosemary, and thyme! And if you have a lot of sun, get a couple of tomato starts!!
Good luck and please let me know how it goes! Aloha! ~Megan
Pingback: 5-Minute Fresh Garden Salsa Recipe | Country Cleaver
Thank you for all the tips and ideas for using stock tanks. We are in the process of building a stock tank garden and have already purchased 4 2x2x6 tanks. We are also mixing a bit of Perlite in with the mixed soils. We live in So. Oregon where August and beyond temps can reach 100+ for weeks on end. Any suggestions on shade coverings?
Thank you!!
LoriAnn I’m so excited you’re doing stock tanks!! Yeah, those 100 degree days can definitely do a number on plants. I don’t have any sugguestions off the top of my head for shad coverings – but maybe a hoop house style shade could help – like a canvas overlay to keep it breathable, but still get you that shade? And with these, you’ll definitely have to water once or twice a day when temps get THAT high. 🙂 Good luck and tag me in any photos you post on social so I can see!! 🙂
I read an article about stock tank gardening and they gave some specific items to layer before adding the soil. It started with rotting logs and had a few other things as well. I believe it said it was an old German way of growing vegetables. Does anyone know what the rest of the items were?
Hi Bev!! Yeah, the logs and old leaves are popular. For shorter stock tanks like my 12″ tall ones, it doesn’t leave much room for the logs in the bottom. They are better in the 24″ tall tanks. Instead, I just amend the soil between growing seasons with fall leaves, and fertilizer that gets mixed in and allowed to decompose over the winter.
Can you tell me how many plants roughly fit in each tank? Thanks!
I would stick with putting no more than 8 herb plants in each stock tank. They will definitely fill it up! Or pick your favorite 6 to give them the best chance to not overfill it!
How is this going for you? Your post is the first manageable one for me to to take in and is enough for my head to grasp haha! any other tops you’d throw in? planning to buy supplies this weekend
also- adding how many vegetables do you put in each stock tank? i know you commented herbs but im wondering for actual vegetables
Hi Haley, it depends on the vegetable! Follow the instructions and recommendations on the tags or packages of the seeds for the correct spacing guidelines. That ensures that they don’t get overcrowded and can get the right amount of nutrients to grow their best. I wish I had a proper answer for that, but it’s a little trickier to answer than herbs 😉
Not sure how to reply directly to you, but thank you!!
Enjoyed your article! We love stock tanks. Take your plan to the next level by turning it into an Earth Box. Don’t ruin the tank by drilling holes in the bottom so could be resold as a regular tank, not just for gardening. Modify the existing drain tube so you can see the water level from the outside of the tank. Earth boxes use less soil. The water reservoir keeps the tank cool in hot weather and plants warm at night. Only need to fill our tank once a week through the fill tube with a hose. We typically don’t get rain in the summer here. No drip irrigation or watering by hand. We grow all the veggies you list, and more, in 2 x 2 x 6 Earth Box Stock tanks. Add perlite to fluff up soil. My tanks are 10+ years old and still look new. If replacing soil, move the old soil to a no-dig Hügelkultur garden. We love those too.