Laundry Room Final Reveal with Maytag
Turn your Pinterest laundry room dreams into reality with a stunning renovation. Get inspired by this laundry room remodel project.
This post is sponsored by Maytag
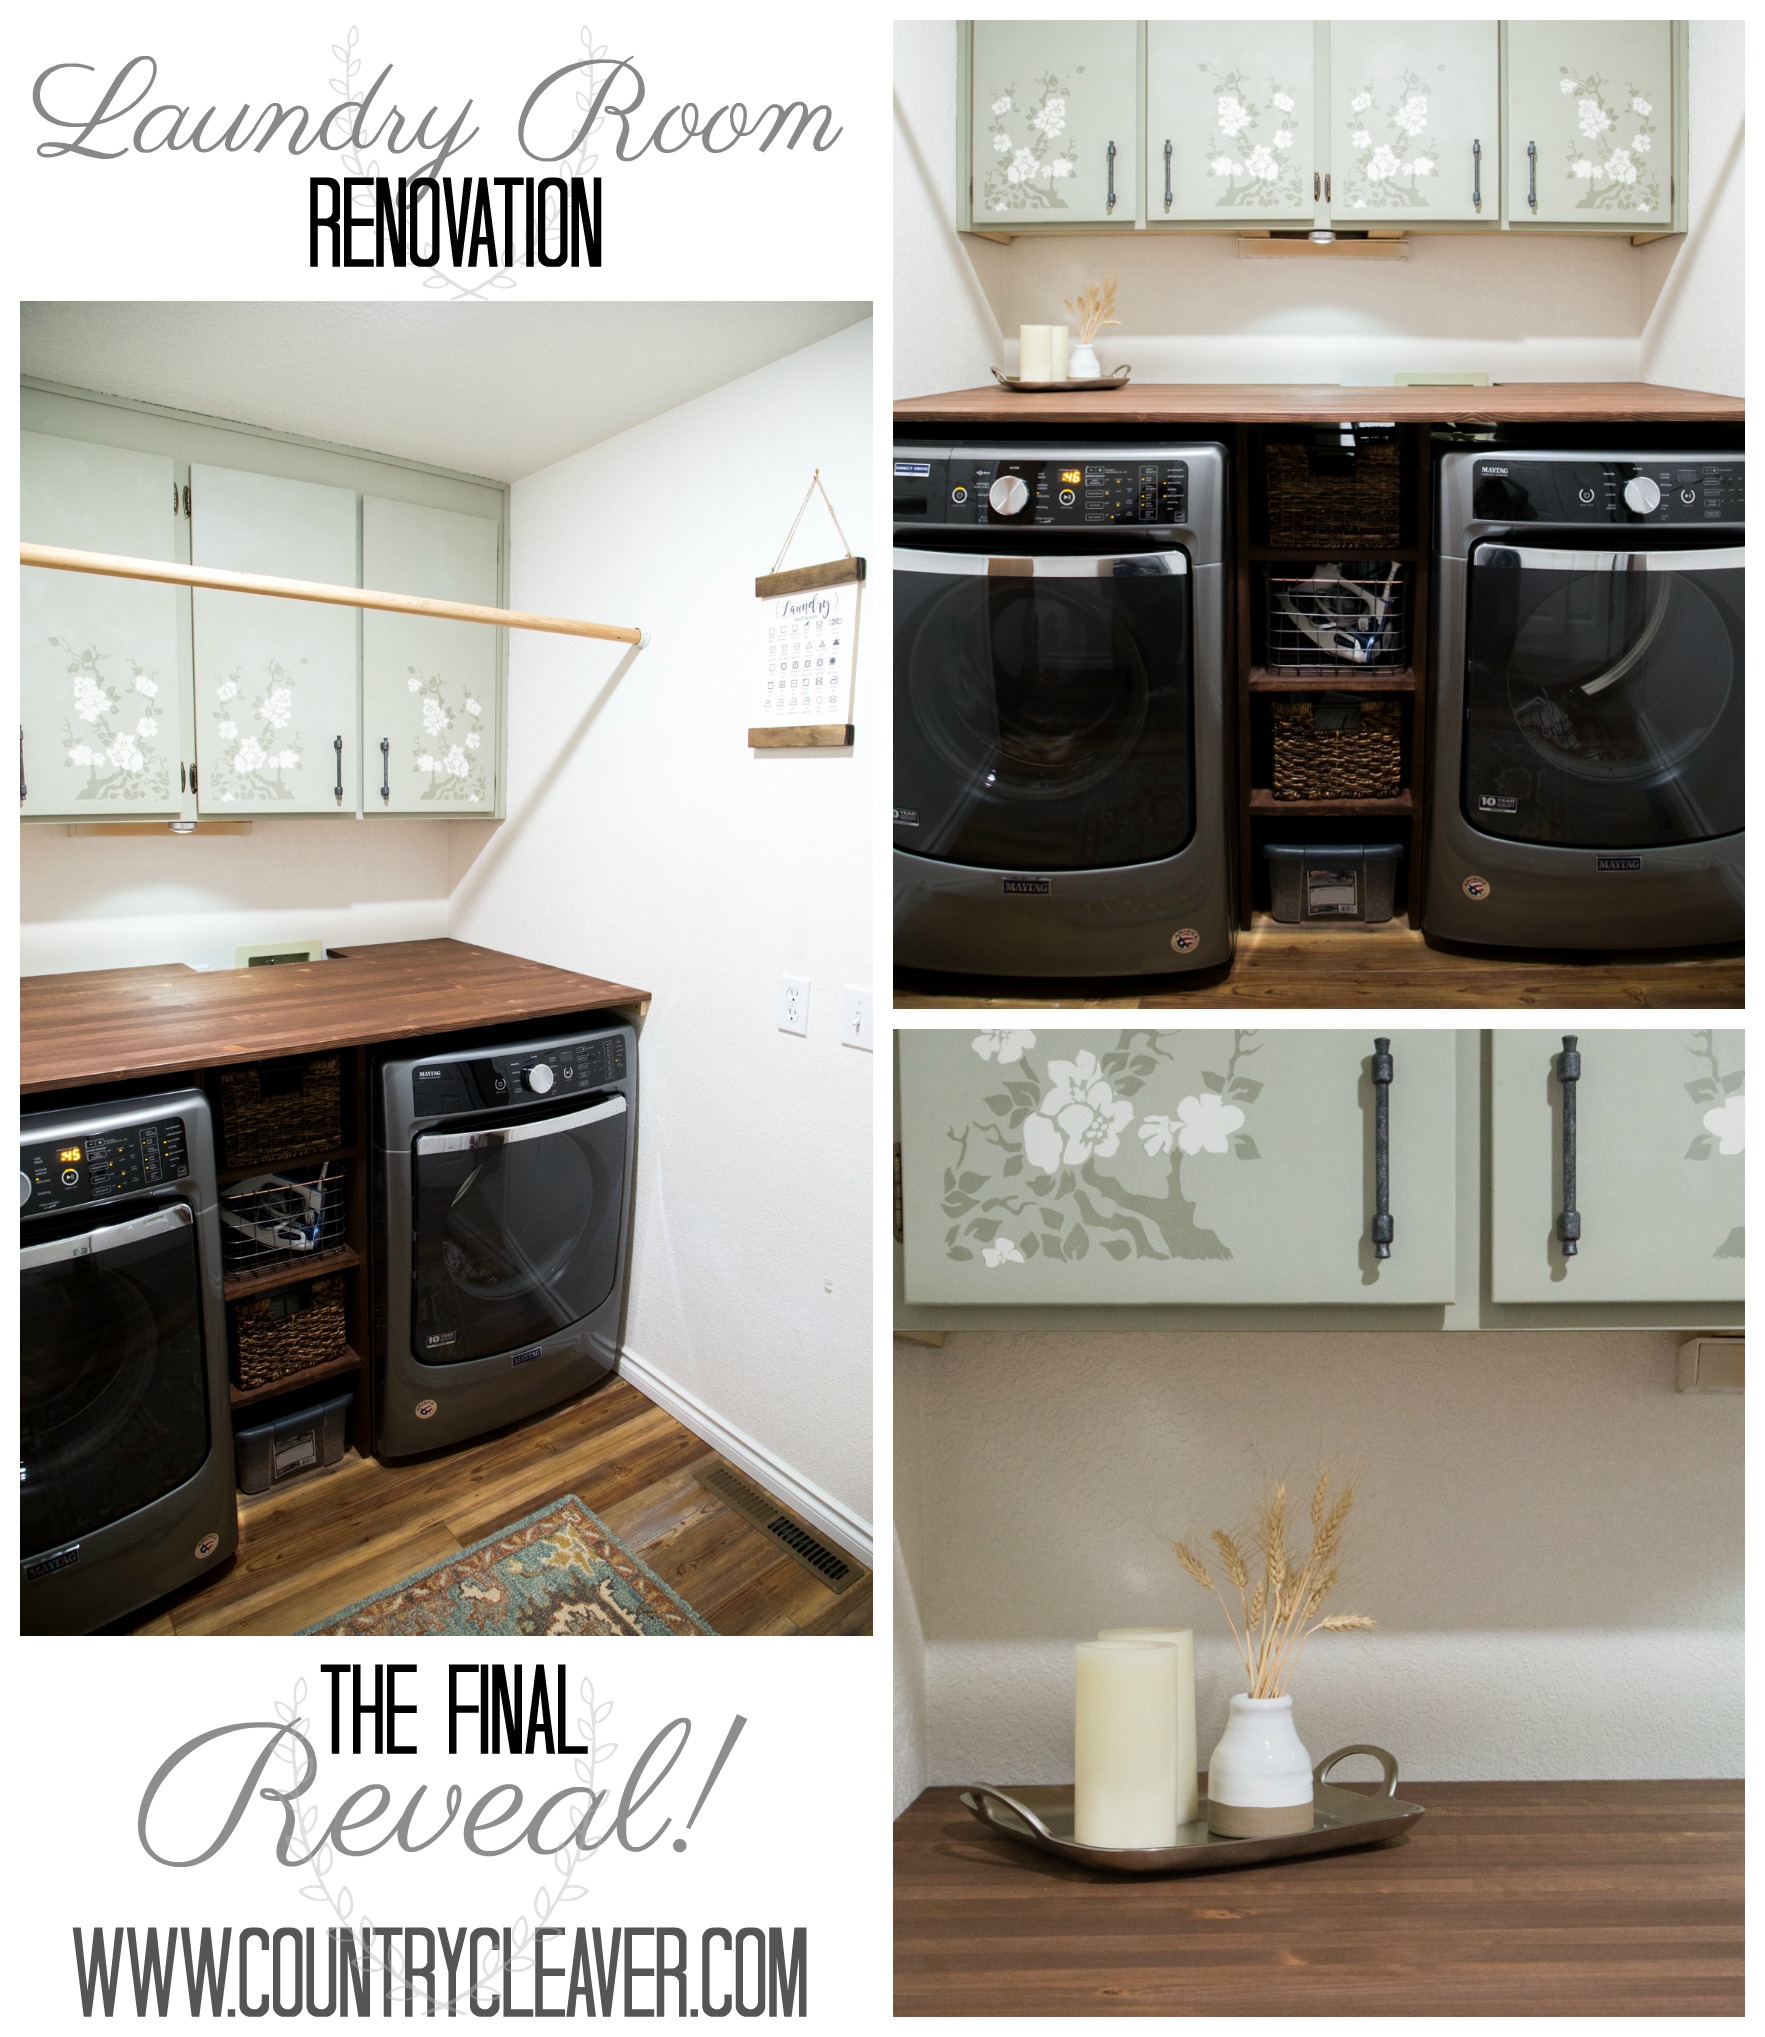
It’s finally here, the grand reveal that is nine months in the making. We are done with our first official house remodel project, and I am beside myself with how well it turned out! Who says that you can’t make your Pinterest dreams a reality? When we bought the house last year, we were content with everything about it, but I was determined to put my own touch on a few things. It seemed like a good idea at the time, a laundry room renovation when I was six months pregnant, because compared to house hunting and moving, a little laundry room revitalization was small potatoes!
Uhh, maybe not so much. I had plans in my head, a design and inspiration board to lead me all the way through, and a few particular sources of inspiration. My goal was a mix of farmhouse style, with light and dark contrasting features, and a countertop for folding laundry. I was determined to add my personal touch with a few choice items. Our beautifully designed, white Maytag washer and dryer and really helped make our design easy.
We have long touted our love of our washer and dryer. They have helped us get through the baby prep, washing all of his clothes before his arrival, to the endless loads of laundry afterwards. We debated between top load vs front load, but front load was definitely what works best for us. The two features I have loved the most? The Fresh Hold® option that keeps our clothes fresh and clean as it tumbles after the cycle ends, so when I can’t immediately change the laundry from the washer to the dryer our clothes don’t get that stale smell. And the Sanitize Cycle that uses extra hot water to keep Ben’s hospital clothes and Emmett’s baby clothes extra clean.
To Use Pedestals or Not?
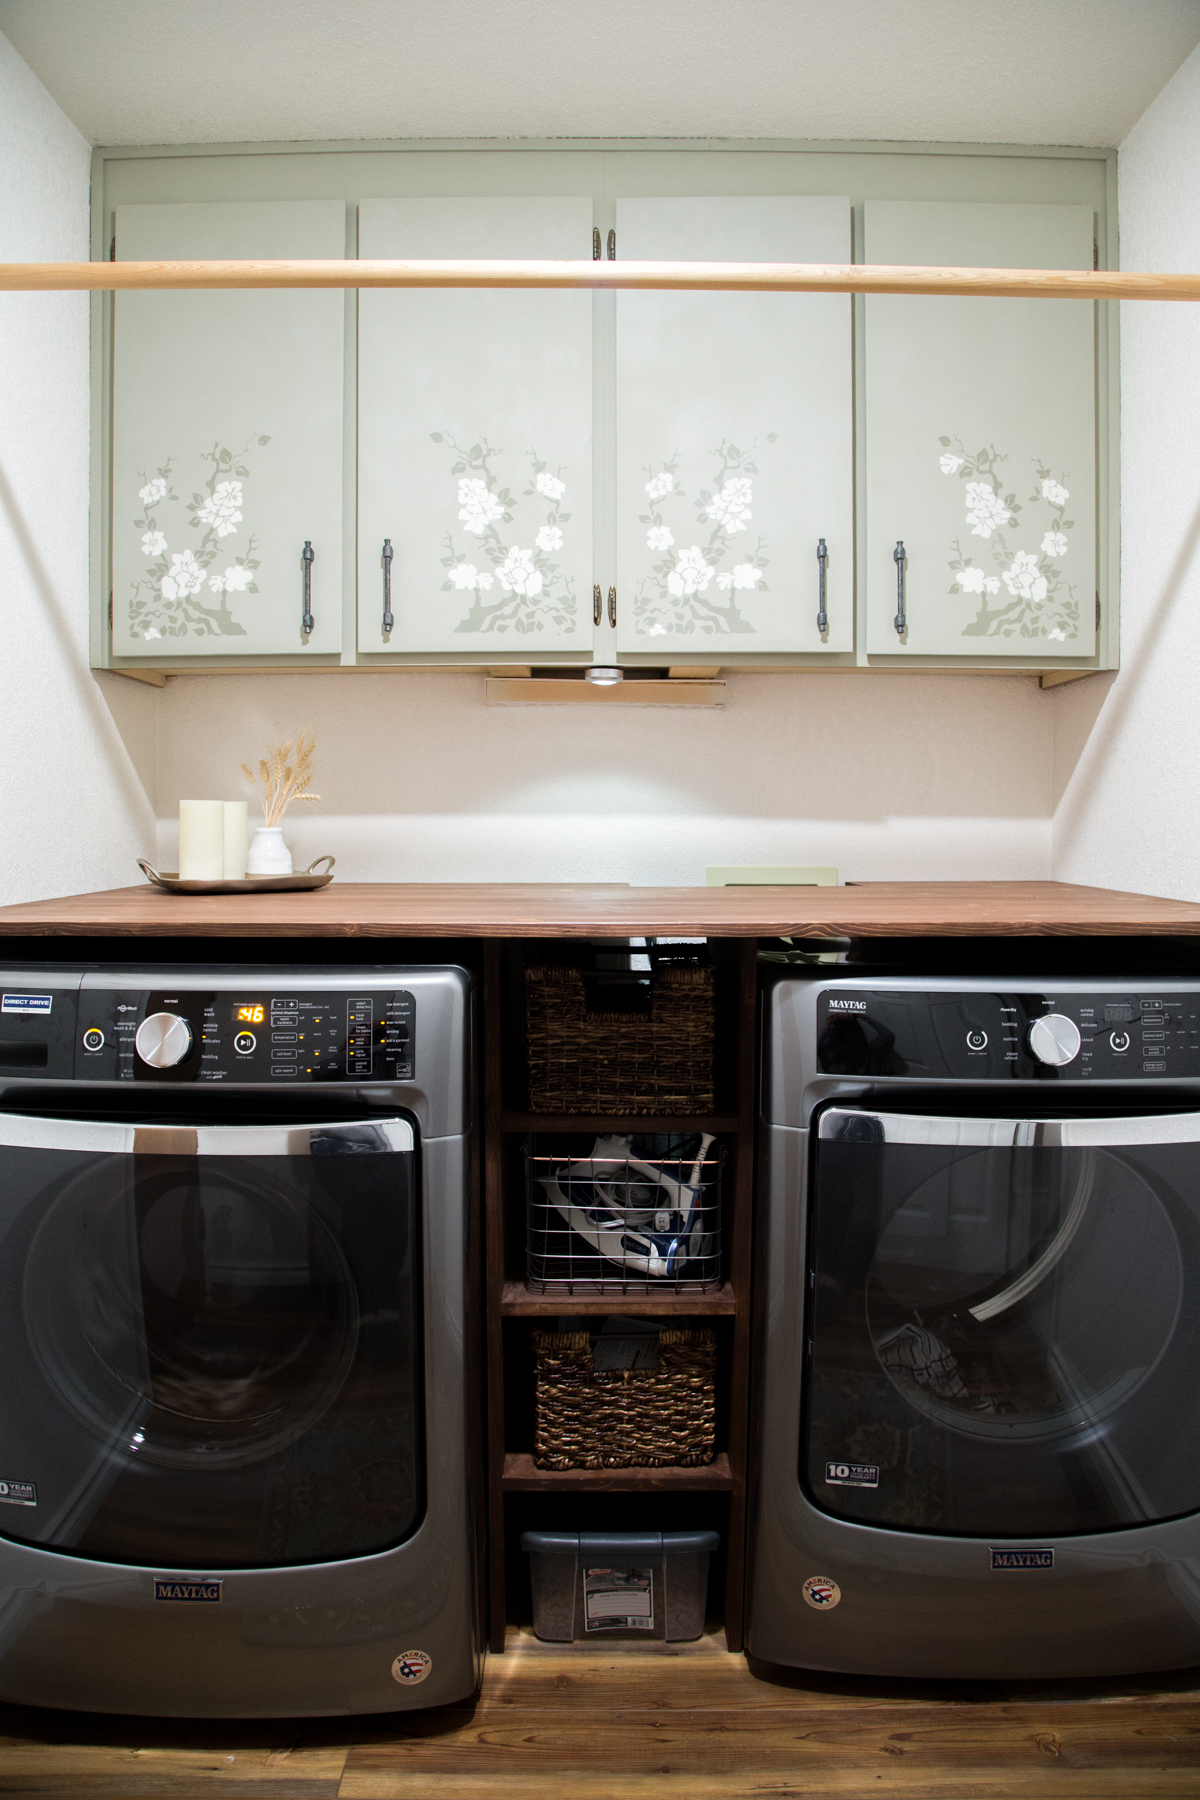
Through the process, we had our units set on top of two pedestals that made them tall enough that I could put clothes in and move them to the dryer with my baby belly easy! But the idea of a countertop won out and we opted to remove them so I can have a dedicated folding space on top. No more of having a chair in our house that holds the laundry!
Ben had his own marching orders, and I wanted him to take part in the process as well by making my countertops. He’s a budding wood worker, and as part of the deal with the house, I would let him take over one bay of the garage as a mini wood shop. Like all plans, our time was dedicated to our daily lives, work, home, prepping for baby, and then THE BABY! Emmett’s arrival meant a three month delay with his round the clock cuddles and care. Not that I minded! But in between quiet times, at nap time and when I could spare a few minutes, my key stone project of painting the cabinets became my focus.
So what did we do? Come see our full reveal of our small laundry room renovation!
From the top to the bottom we made the laundry room “ours” and wiped away the remnants of the old owners. The linoleum floors were overlaid with Blue Ridge Pine-colored tiles. What I loved about this was its durability especially in high traffic areas (our laundry room separates our garage from the rest of the house), and that it is waterproof (great for a laundry room!). To save my sanity, we had it installed by our local hardware store. Sanity is always worth spending a few dollars.
Make Your Own Counters!
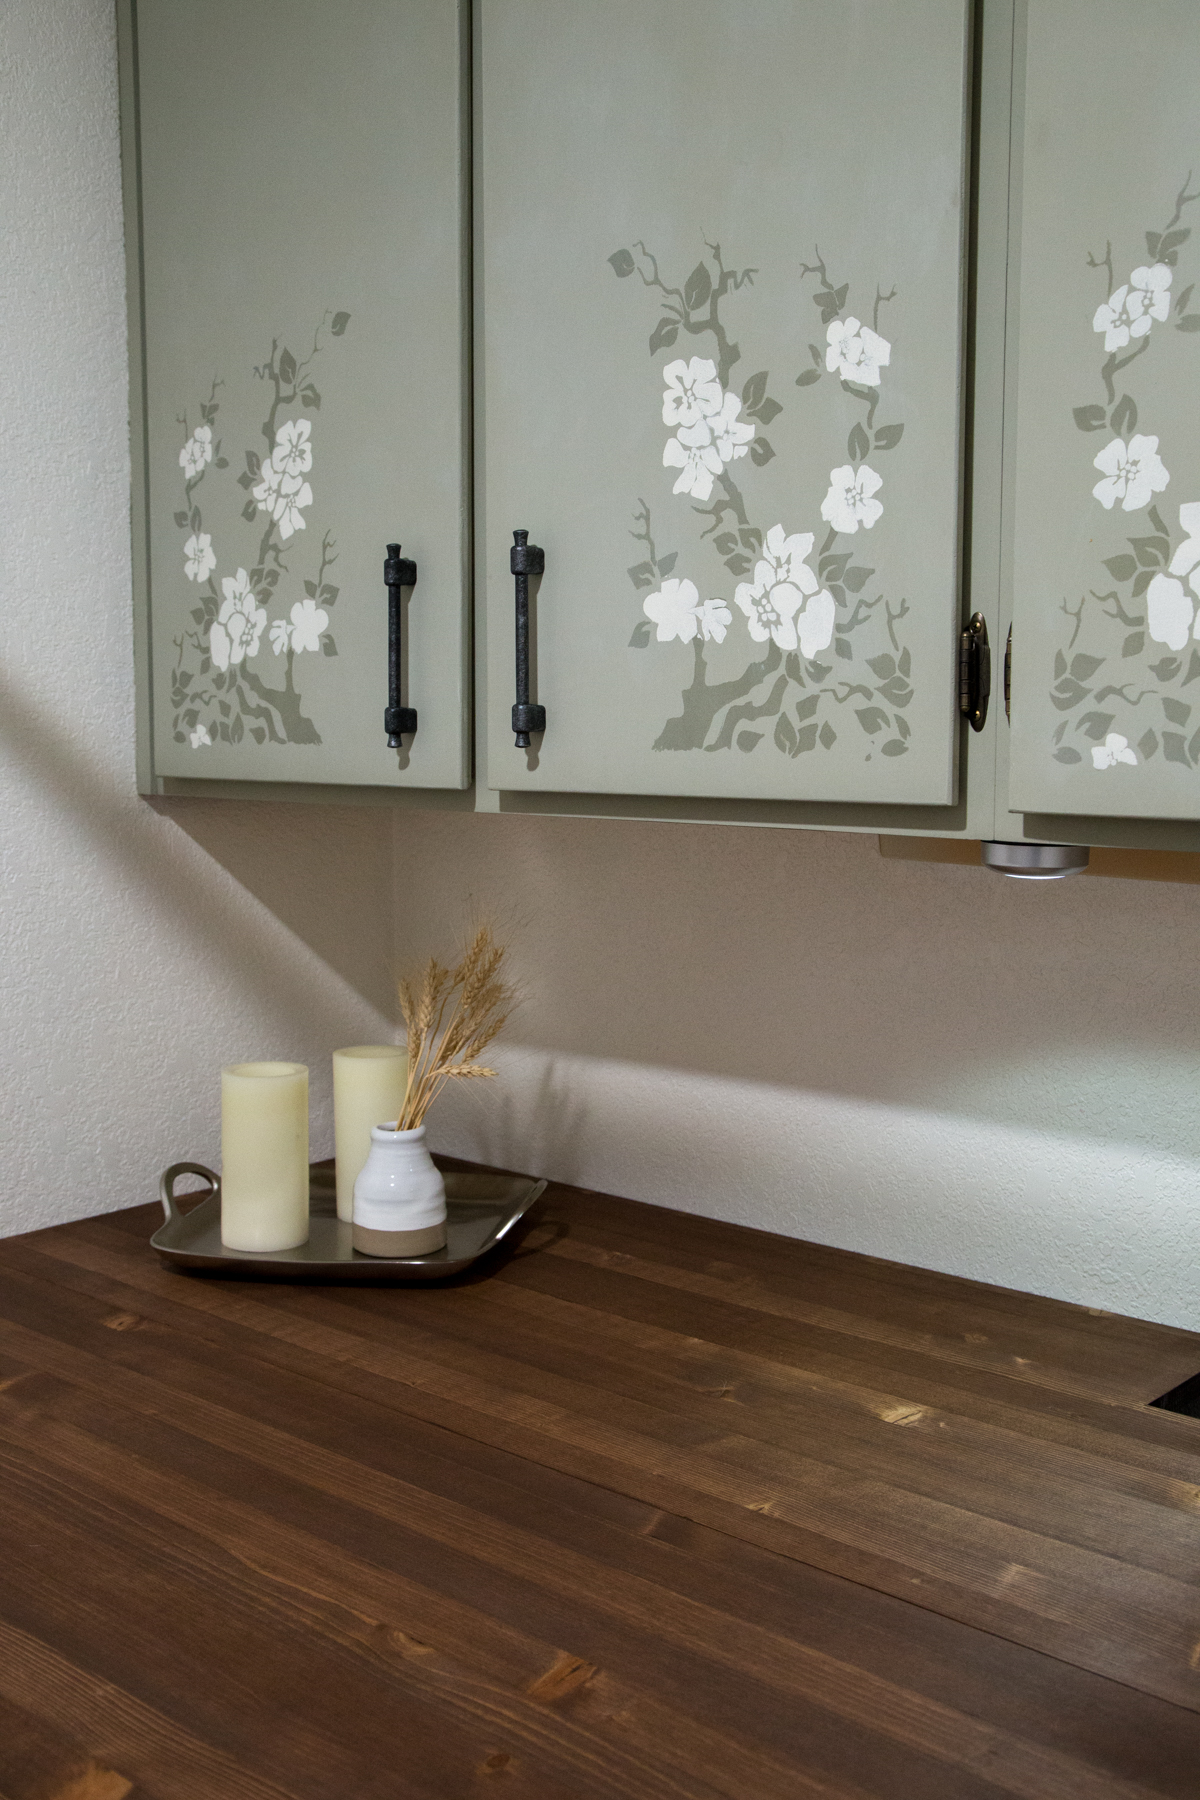
For the counters, instead of a completely solid wood counter, Ben and I agreed that we could cut a few proverbial corners in our wood selection to save money and time. To make the counter we decided that the pre-laminated craft boards you can find at your local hardware store would be perfect! These boards laminate and join together larger strips of wood for easy craft projects. When stained they have variable patterns and colors that I liked and really, no one needs to know you didn’t do it yourself. Because I love the cream walls and contrasting counter trend, I picked out a stain in old hickory. See our video below of our progress. The color was everything I was hoping for, not too matchy-matchy to our floor, but the overall look was just what I wanted. What do you think?
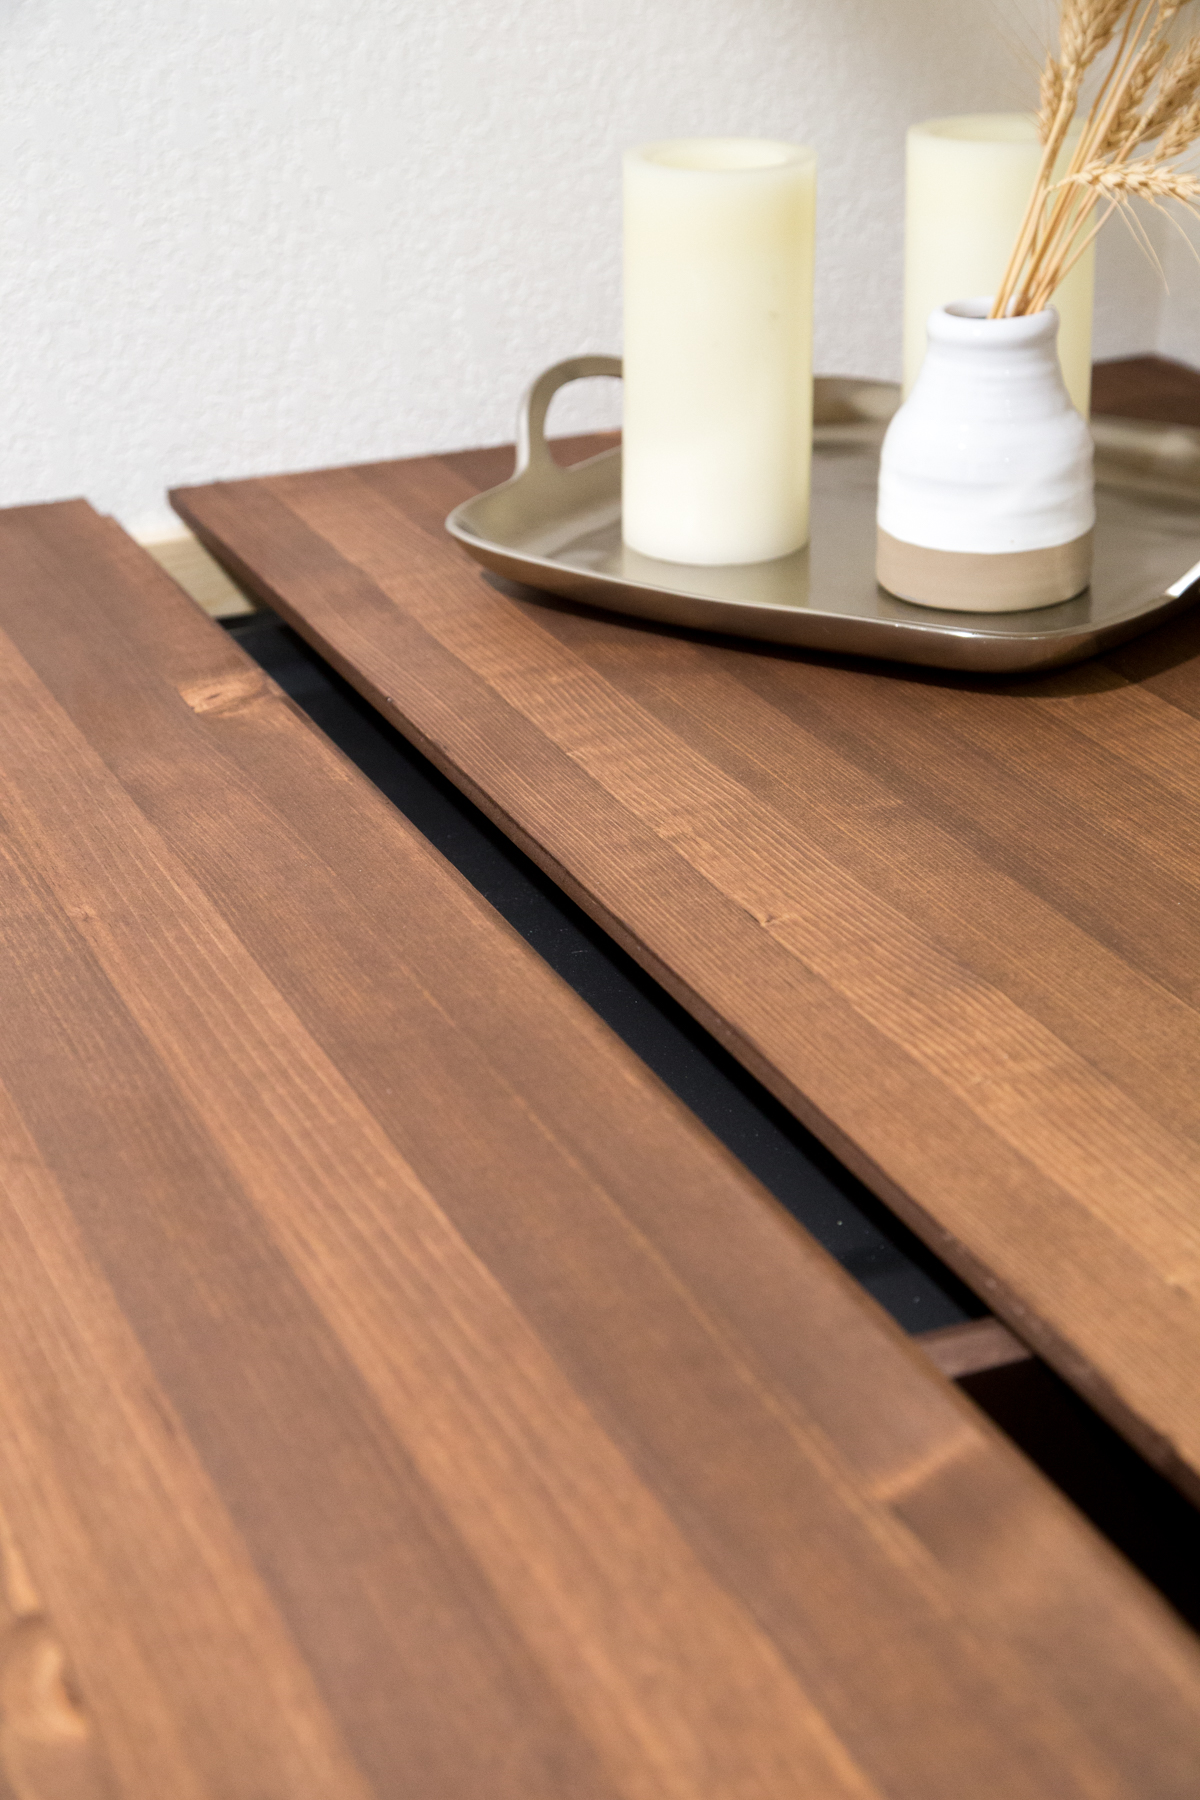
To make it easier to access the water shutoffs, or if heaven forbid we need repairs, Ben made a cutout in the back near the wall, and created a shiplap joint so the counter could be easily removed. Totally genius move! In between the washer and dryer Ben had enough wood leftover to build me some shelves for additional storage. It has been so helpful!
Picking Paint Colors
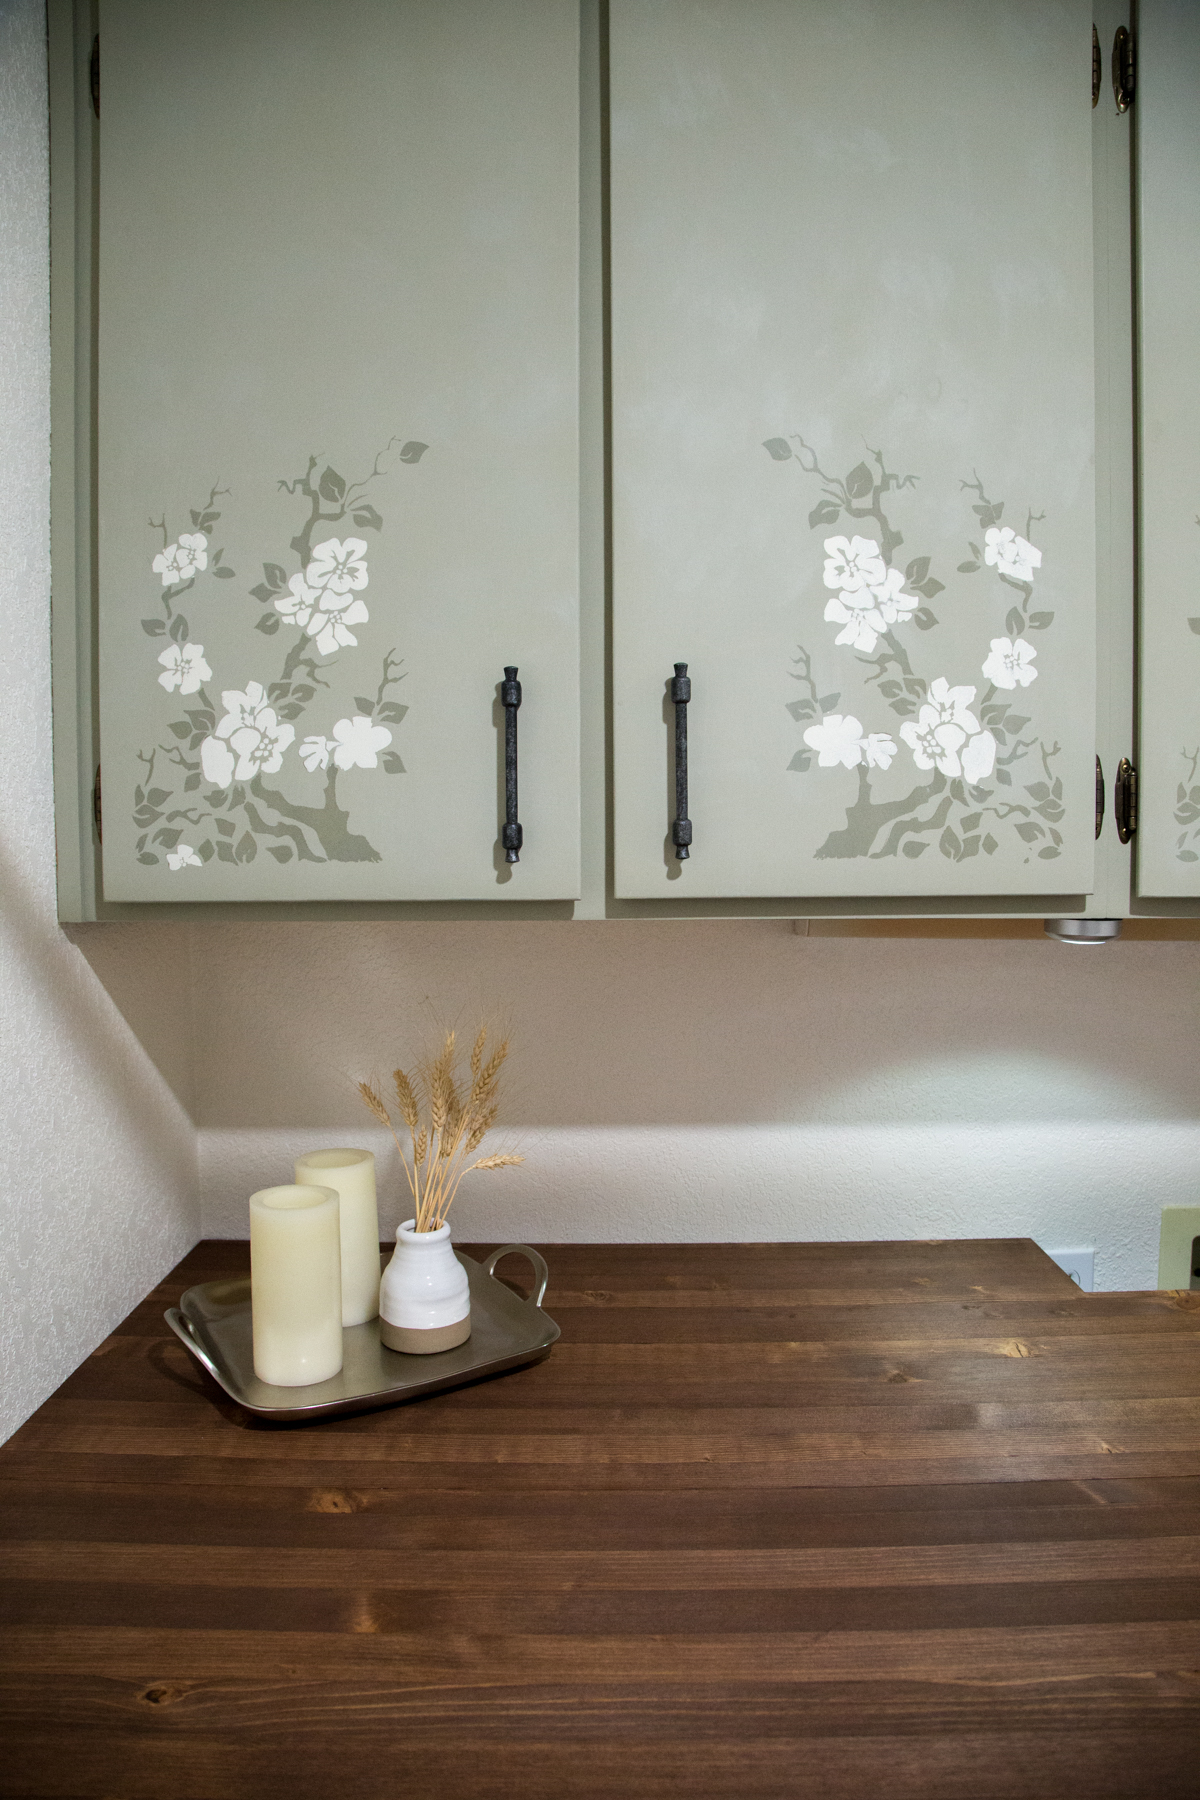
Now, painting was one thing I went back and forth on. Do we change the wall color? Keep it the same? Gray? Off white? Something funky? In the end we (really, I use “we”, when it was probably more me. HA!) just kept it as-is. It was fine for us, and truth be told, one less project that I didn’t need to contend with. But the cabinet doors were another story. The honeyed oak color was dated and plain. I went with painting them over with chalk paint from Annie Sloan. Then, I really went bonkers and stenciled them. My grand plan is to do a blog post and video about our cabinets, because these were probably the most fun part of the renovation for me. This was my nap-time-craft project.
What Kind of Paint is Best?
Painting gives me a headache, even low VOC paints, which prompted me to go with chalk paint. I picked out two different colors, Chateau Gray and Old White. What I loved about the gray was that it was practically an antiqued green color. So for the doors, I blended a 50/50 of the two paints and went to town. But for the stencils I used the paints in their full color formats to paint the dogwood trees. What do you think? These took the most time for me, but by far are my favorite part of the project. We even ordered door handles to really complete the farmhouse look.
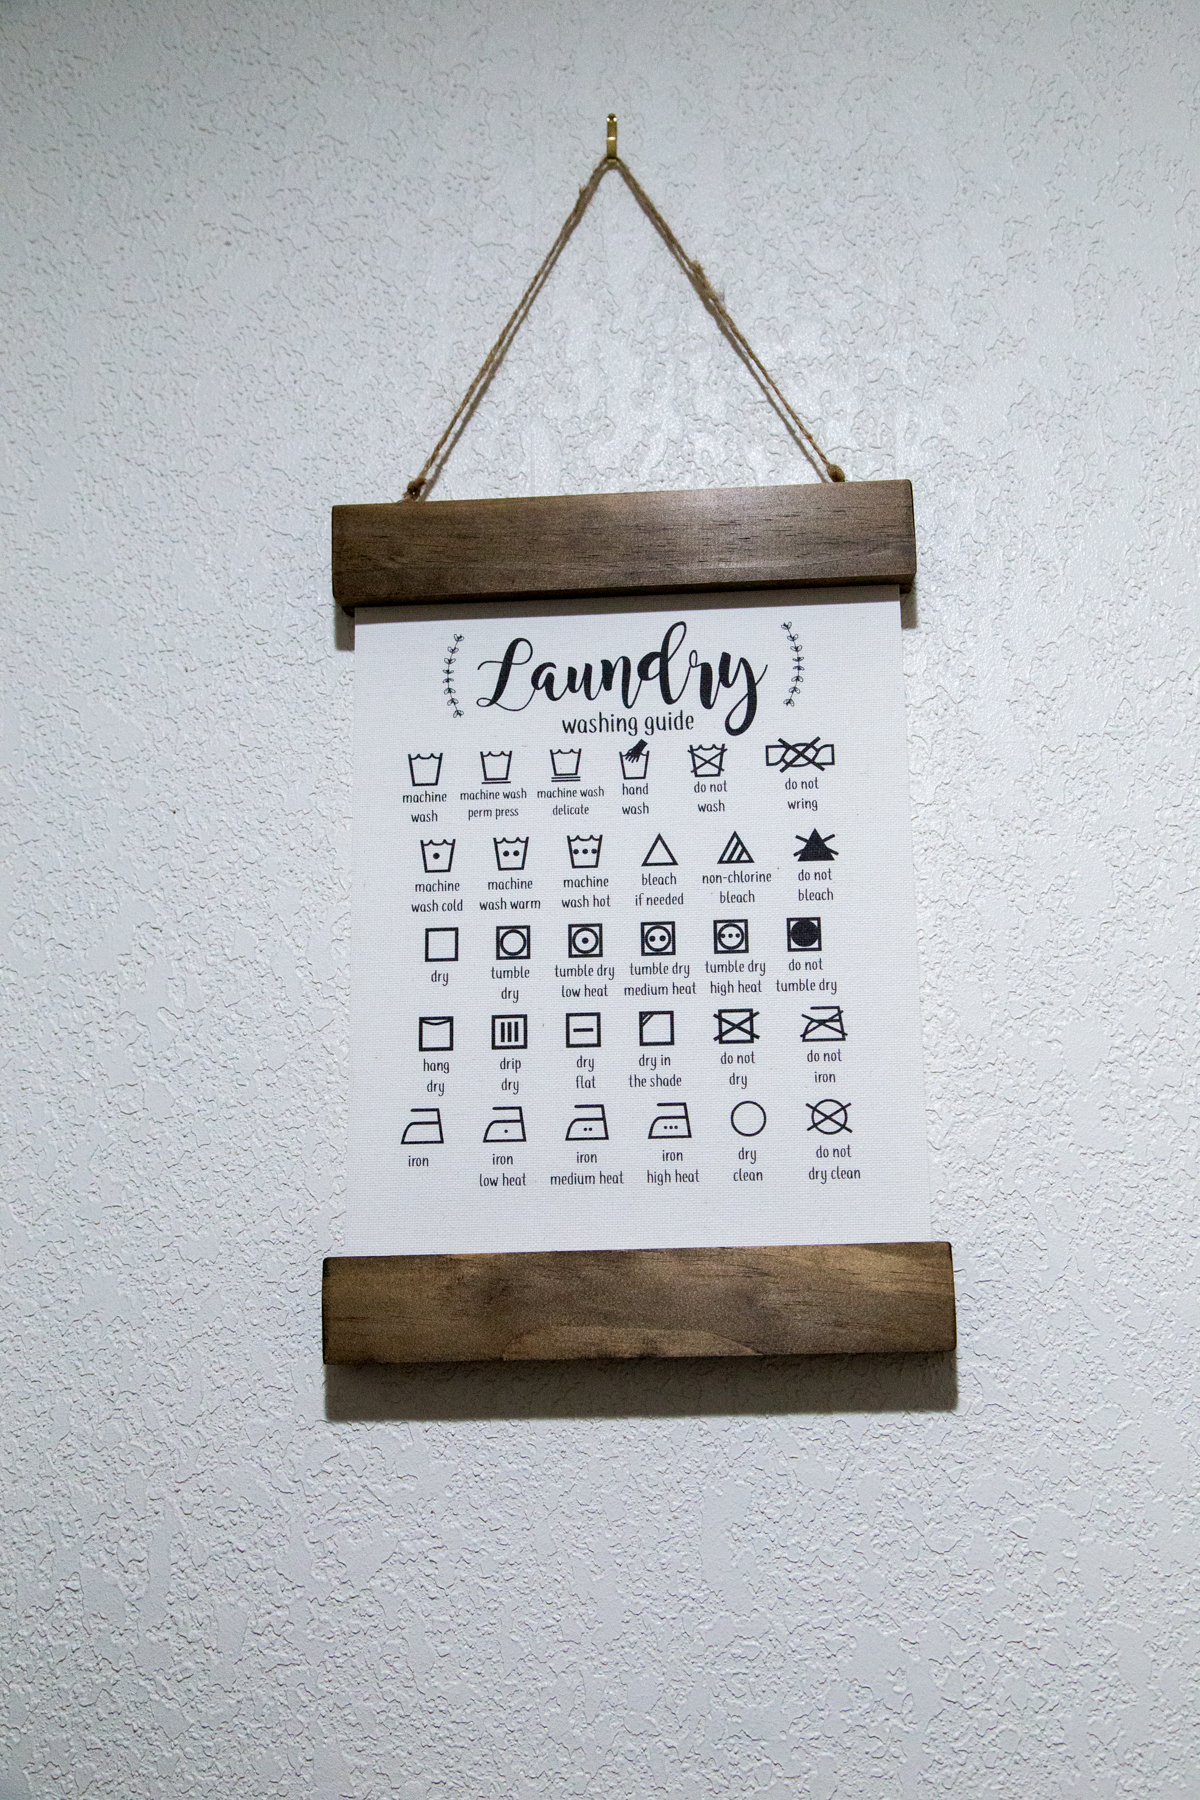
Keeping with the theme, I picked up two scroll signs for our house. I picked signs specific to the laundry room with handy guides, a stain removal guide, and chart for all those pesky symbols strategically tucked away on your clothes. They’re a darling and handy reference!
A few more little touches made this space warmer and more inviting. I added under-cabinet push button lights and some timer-driven LED faux candles so I can see my way through the room and not stub my toe early in the morning when I am pulling a shirt out of the dryer. Because 4am wake up times with the baby are rough, y’all.
Overall, I am so pleased with how this turned out. Maytag has been a great partner and these units make a true statement in our laundry room. They will be there for years to come, with a great design, sturdy and dependable construction, and features that will make my life easier in the long run. Keep up to date on more of our upcoming designs and projects. And stay tuned for future posts on my how-to’s for stenciling cabinets, and more!
See the before photos of the laundry room renovation here!!

Looks gorgeous! I will remember this washer and dryer when we need to upgrade soon!
SUCH a gorg laundry room! You’re giving me laundry room envy!
Pingback: Laundry Room Final Reveal with Maytag - Lizzie Arden
Pingback: Country Guest Room Reveal! - Country Cleaver
Pingback: 70 Inspiring Laundry Room Decor and Organization Ideas - Industry Standard Design